
How do I perform a Firmware Recovery for my DWL-3600AP?
Requirements: Refresh Files:
– Console cable refresh_files(1224102018).7z
– PuTTy
– Tftp Server
Step 1 – Insert one end of a RJ45 cable into the LAN(PoE) port of the DWL-3600 and connect to your PC
Step 2 – Configure your LAN card as follows:
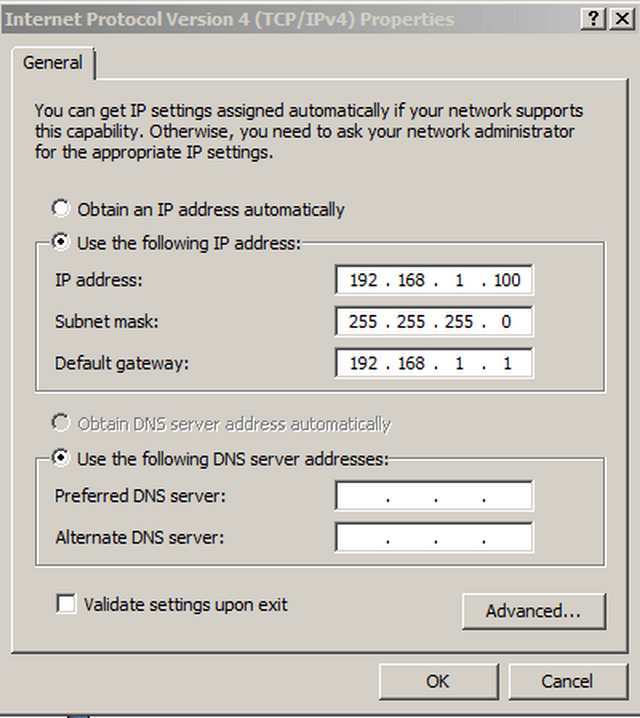
IP address: 192.168.1.100
Subnet Mask: 255.255.255.0
Default gateway: 192.168.1.1 (APs default bootloader IP)
Step 3 – Download PuTTy software from the following link:
http://www.chiark.greenend.org.uk/~sgtatham/putty/download.html
Download the putty.exe
Step 4 – Download a tftp server (you could use the following link):
http://tftpd32.jounin.net/tftpd32_download.html
(Install the Standard edition (installer) 32bit or 64bit depending on your OS)
Step 5 – Insert the console cable into related port on the DWL-3600AP then install PuTTY and configure as follows:
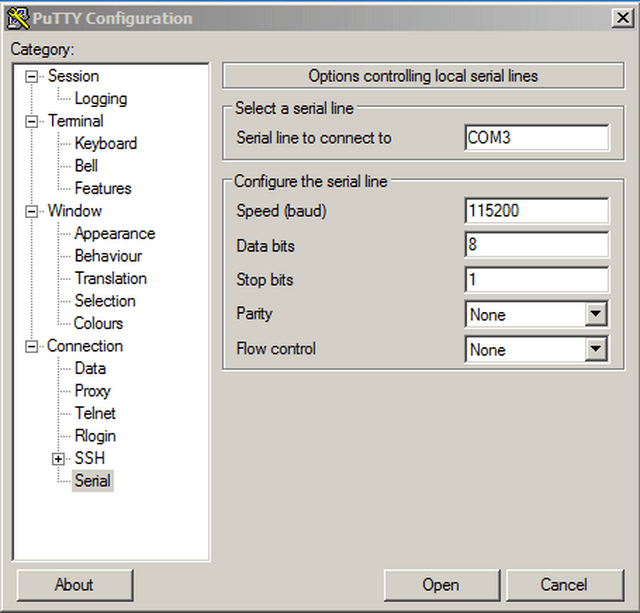
Serial line to connect to: COM3 (The above will be present in device manager)
Speed (Baud rate): 115200
Data bits: 8
Stop bits: 1
Parity: None
Flow Control: None
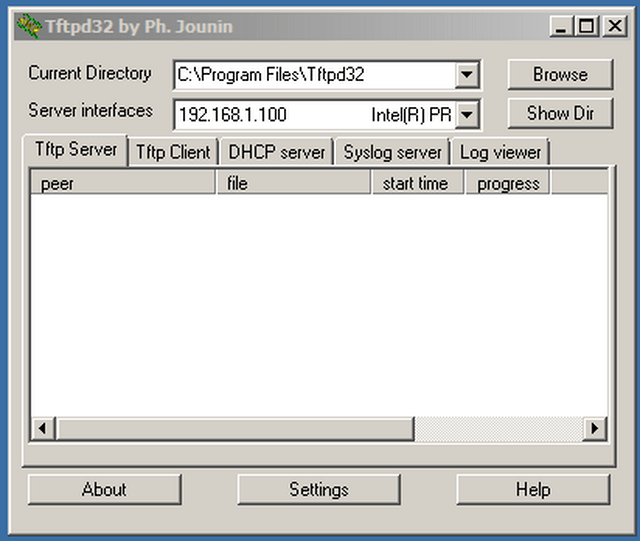
Step 6 – Install tftp Server then configure as follows:
Current Directory: C:\Program Files\Tftpd64
Server interfaces: 192.168.1.100 (IP from Step 2)
Step 7 – Unzip the .7z folder and transfer ALL files to the root directory of the tfp server (C:\Program Files\Tftpd64)
Step 8 – Click on “Open” on PuTTY to start the connection via console
![]()
Step 9 – Hit enter key and you should be presented with the Login screen
DLINK-WAN-AP login: admin {Enter}
Password: admin
Step 10 – Type the following command
![]()
Step 11 – Once rebooting wait until for “Press Ctrl+C for CFE boot loader menu.”
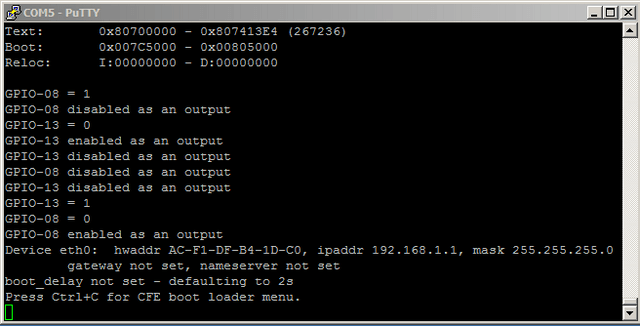
If you have done this in time, you should expect to see the following screen. If not wait for next login then execute the command: reboot
![]()
Step 12 – Enter the following commands (copy and paste):
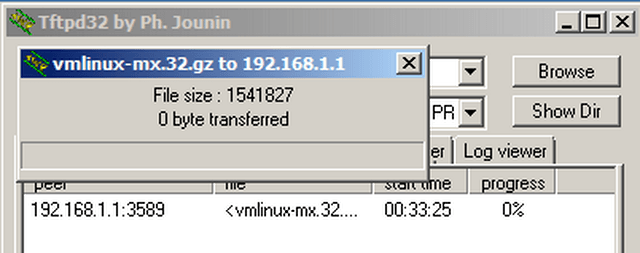
CFE> flash -noheader 192.168.1.100:vmlinux-mx.32.gz flash0.kernel1

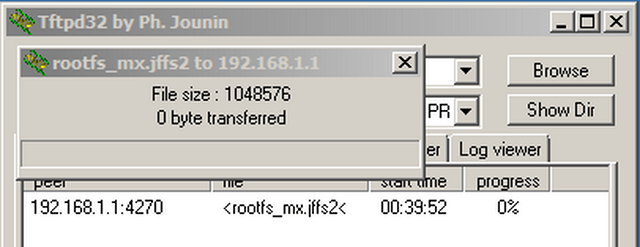
CFE> flash -noheader 192.168.1.100:rootfs_mx.jffs2 flash0.jffs2

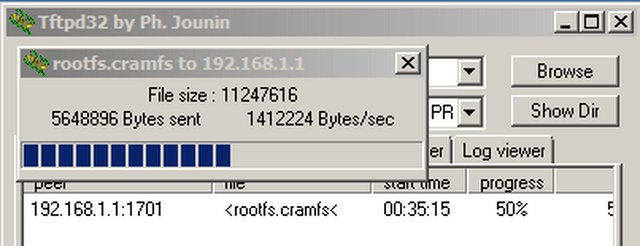
CFE> flash –no header 192.168.1.100:rootfs.cramfs flash0.cramfs1

CFE> reboot
![]()
Step 13 – Once a complete reboot has finalised, you should download the latest firmware and upgrade (twice) to ensure both images are flashed.
Step 14 – Factory reset the AP by pressing and holding reset button for 10 seconds
Please note once reset the default IP will be: 10.90.90.91 and you will need to adjust your LAN setting on the PC connected to be on the same subnet.
*If the tftp server gives a failure message, please turn off the firewall and /or any antivirus program that may block its correct functionality