
How to Upgrade the Firmware – DSR-500N and DSR-1000N via CLI?
NOTE – The Upgrade process will need the following:
• Console Cable
• tftp server
• Firmware – Download the latest firmware on our website
• PuTTy
Step 1 – Connect the serial port of the DSR with your PC and an Ethernet cable to a port on the DSR and connected to a switch on the same network
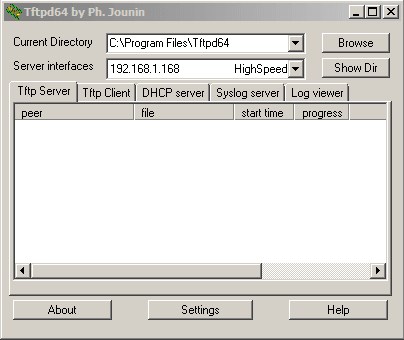
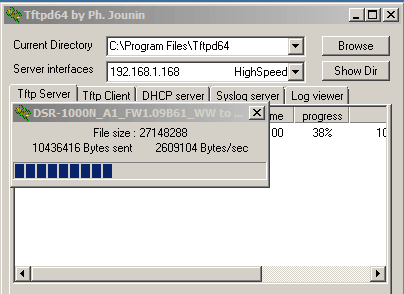
Step 2 – Open the tftp server and put the firmware of the DSR into the root folder
For example: C:\Program Files\Tftpd64
Step 3 – Open PuTTy and setup a COM port (this will be present in device manager)

Step 4 – Click on “Open”
Step 5 – Hit enter key and you should be presented with the Login screen
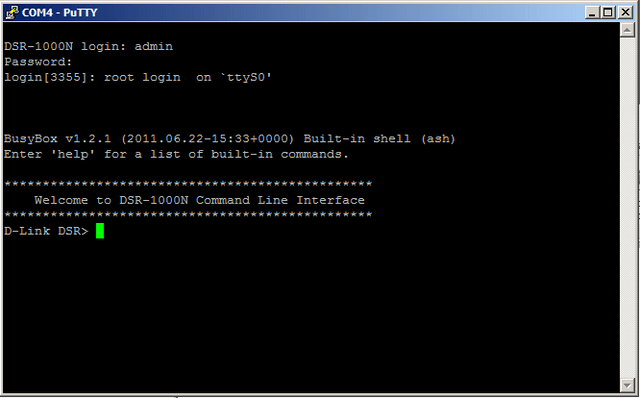
DSR-1000N login: admin
Password: admin
Step 6 – Enter the following command to enter into the system time configuration
D-Link DSR> .reboot
Router will be up in 85 seconds.
Step 7 – Once you see the boot process and see the message “Hit any key to stop autoboot:” hit the enter key to enter the bootloader#
![]()
Set the environment variables (Copy and paste into CLI):
Step 8 – Enter the following command to set the DSR to the subnet of host
![]()
D-Link DSR-1000N bootloader# setenv ipaddr 192.168.1.16
Step 9 – Enter the following command to the IP of the host where the tftp resides
![]()
D-Link DSR-1000N bootloader# setenv serverip 192.168.1.168
Step 10 – Enter the following command to set all tftp transfers on LAN ports
![]()
D-Link DSR-1000N bootloader# setenv ethact octeth0
Step 11 – Enter the following command to firmware flash and erase

D-Link DSR-1000N bootloader# setenv firm_flash 'erase BDCA0000 BF99FFFF; cp.b 0xaa00000 BDCA0000 1D00000'
Step 12 – Enter the following command to sabe
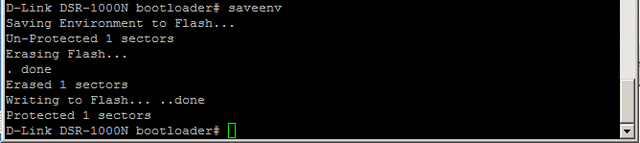
D-Link DSR-1000N bootloader# saveenv
TFTP the image and flash it:
Step 13 – Enter the following command:
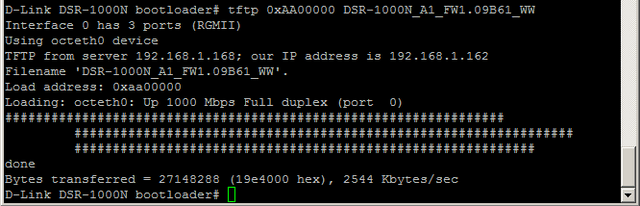
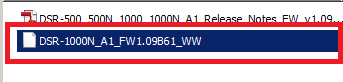
D-Link DSR-1000N bootloader# tftp 0xAA00000 DSR-1000N_A1_FW1.09B61_WW (this is the FULL name of the firmware as shown below)
You should also notice the tftp server starting the file transfer (if not, make sure the firewall is disabled or an antivirus program is not blocking)
Step 14 – Enter the following command to run flash firmware and wait until complete
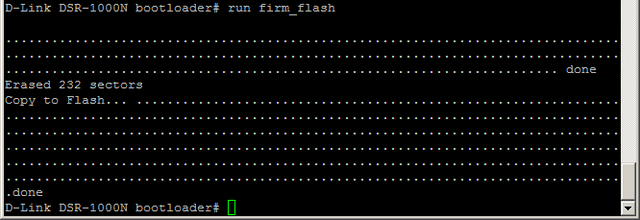
D-Link DSR-1000N bootloader# run firm_flash
Step 15 – Enter the following command to boot firmware
![]()
D-Link DSR-1000N bootloader# run boot_firm
Once the flashing of the image is complete, you will see the u-boot prompt again. At this moment you can now power cycle the DSR.
Step 16 – Login
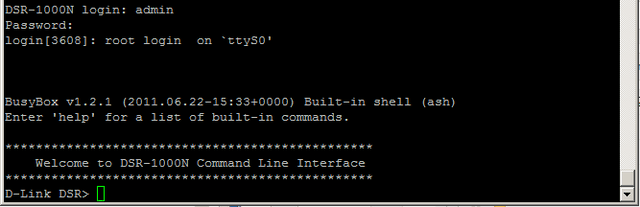
DSR-1000N login: admin
Password: admin
Step 17 – To confirm the current version of firmware and check the update was successful, enter the following command:
D-Link DSR> Show system firmwareVersion
![]()
These may also help:
- How to Set the Time and Date – DSR-500N and DSR-1000N Read Answer