
How do I mount my camera to a wall or ceiling?
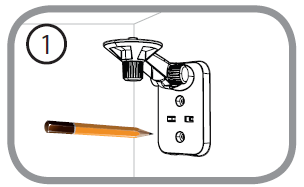
Step 1: Place the mounting bracket where you want to position the camera and use a pencil to mark the holes.
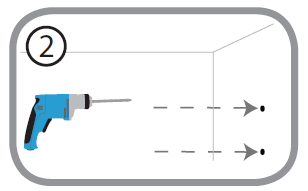
Step 2: Depending on the material of the wall or ceiling, use proper tools to drill two holes or screws where you marked. If the wall is made out of concrete, drill the holes first, then insert the plastic anchors to support the screws.
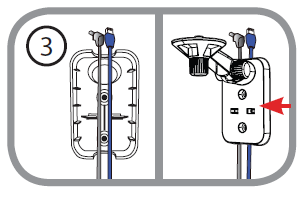
Step 3: The power and Ethernet cables can be concealed behind the mounting bracket. Run the cables through the back of the mounting bracket, securing them with the built-in guides. Be sure to leave enough cable length protruding from the top to allow connection to the camera.
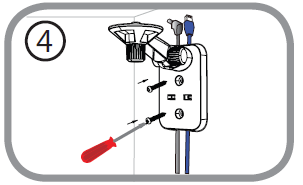
Step 4: Fasten the mounting bracket to the wall using the screws provided.
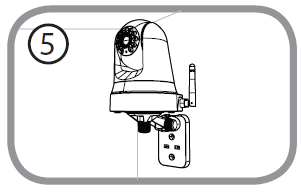
Step 5: Using the supplied thumbscrew, fasten the camera to the mounting bracket. Connect the power and Ethernet cables to the camera.
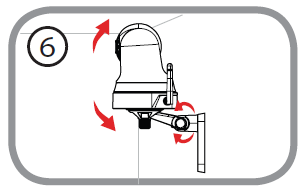
Step 6: Adjust the angle of the arm on the mounting bracket as required. Tighten the thumbscrew to lock the arm in place.
These may also help:
- How do I access my mydlink camera remotely? Read Answer
- How do I change the LAN IP address of my camera? Read Answer
- What can I do when Active X fails to install during my mydlink camera setup? Read Answer
- How do I configure motion detection on my camera? Read Answer
- How do I configure the audio settings on my DCS-5020L? Read Answer
- How do I enable a new camera in D-ViewCam? Read Answer
- How do I manually upgrade the firmware on my camera? Read Answer
- How do I reset my camera to factory default settings? Read Answer
- How do I set an administrator (admin) password on my DCS-5020L? Read Answer
- How do I set up and install my DCS-5020L? Read Answer
- How do I set up motion detection and recording in D-ViewCam? Read Answer
- How do I set up scheduled recording in D-ViewCam? Read Answer