
How to Configure Auto Surveillance VLAN – DGS-1210 Series
Description -When Auto Surveillance VLAN is enabled and configured, all you have to do is connect the IP Surveillance devices to the switch which will then automatically get registered as a IP Surveillance device and is configured on VLAN Surveillance.
By default, the monitoring devices D-Link (cameras) are already pre-configured in the configuration of automatic surveillance. If a 3rd party device (or computer for VMS) is used, you can manually set the MAC address of the device (s) so that the switch can know that the connected devices are part of your surveillance system.Step 1 -Enter the interface configuration of the DGS-1210
Step 2 - Please go to Configuration> Auto VLAN Survillance
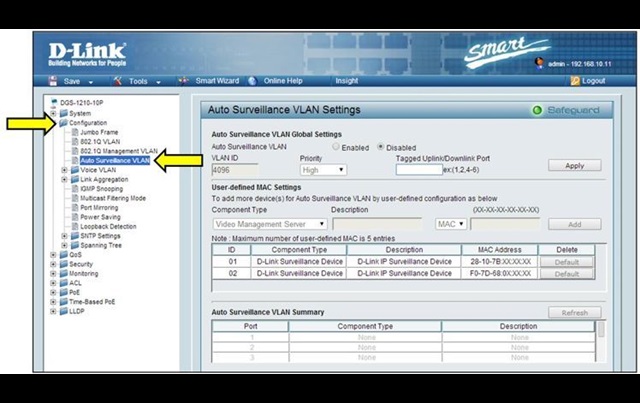
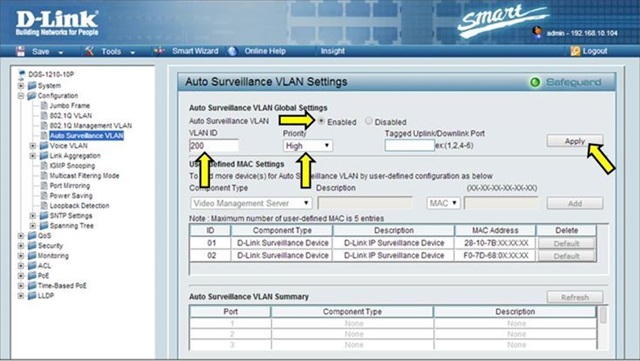
• Auto Surveillance VLAN: Enabled
• Specify a VLAN ID (optional, specify one automatically)
• Specify the VLAN Priority
Then click “Apply”
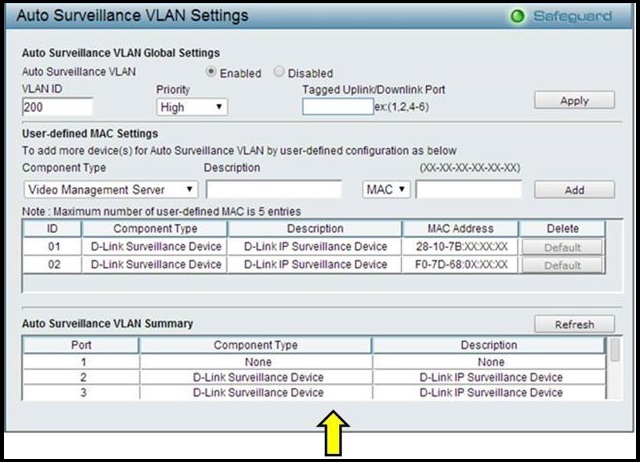
Step 4 - Once configured, any video device D-Link surveillance (cameras) will start appearing in the field of Auto Surveillance VLAN Summary.
These may also help:
- How to Prevent ARP Spoofing - DGS-1210-Series Read Answer
- How to configure Voice VLAN on my DGS-1210 Read Answer
- How to Protection against malicious virus or worm attacks – DGS-1210-Series Read Answer
- How to Setup Security with DHCP Server Screening – DGS-1210-Series Read Answer
- How to Monitor Traffic with Port Mirroring – DGS-1210-Series Read Answer
- How to Configure Link Aggregation LACP - DGS-1210? Read Answer
- How to upgrade the firmware on my DGS-1210 Hardware Revision D1 from 4.00.xxx to 4.10.023? Read Answer
- How to configure Asymmetric VLAN in DGS-1210 Series? Read Answer