How to setup My Surveillance in DNS-320L and DNS-320LW?
To be able to download an install add-ons for the DNS-320L or DNS-320LW, you must be running firmware version 1.04b08 or later. This document assumes you meet this requirement.
Step 1 – Log in to your NAS, and you will see a greyed-out “My Surveillance” icon. Click on it.

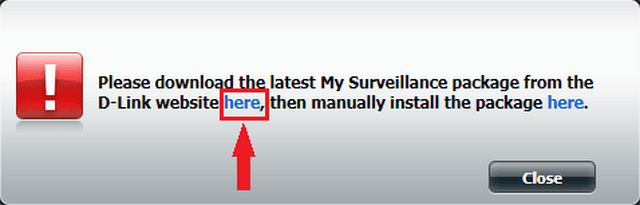
Step 2 – Click on the first “here” in the message. This will download the add-on from the D-Link website.
Step 3 – Ensure you select the option to “Save”.
![]()
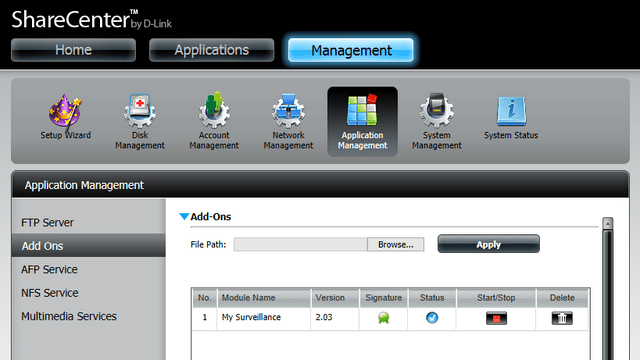
Step 4 – Once the download is complete, click “Management” on the NAS main menu. Then select “Add Ons” from the left hand menu.
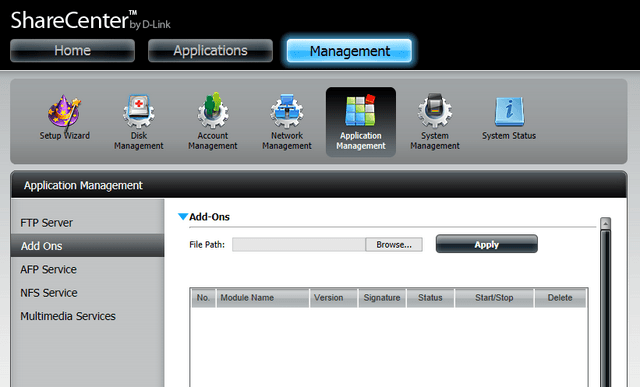
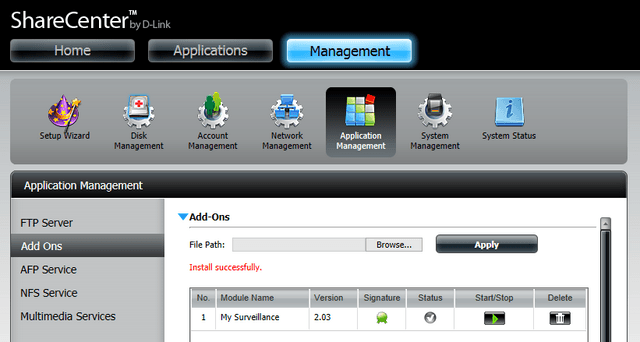
Step 5 – Click “Browse”, search for the add on you have just saved in Step 3, then click “Apply”, to install the add on. You should see a red message saying “Install successfully”
Step 6 – Click the “Start/Stop” button on the “My Surveillance” row.
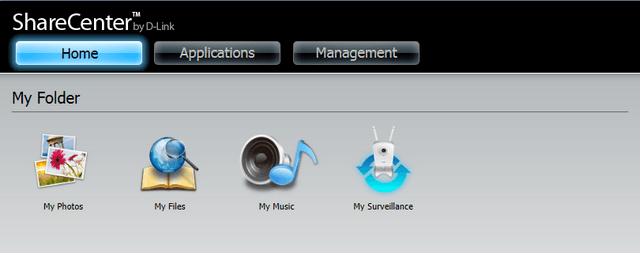
Step 7a – Click “Home”, to return to the main page. The “My Surveillance” icon is now in colour, indicating it can be clicked. Click on it to launch the add on.
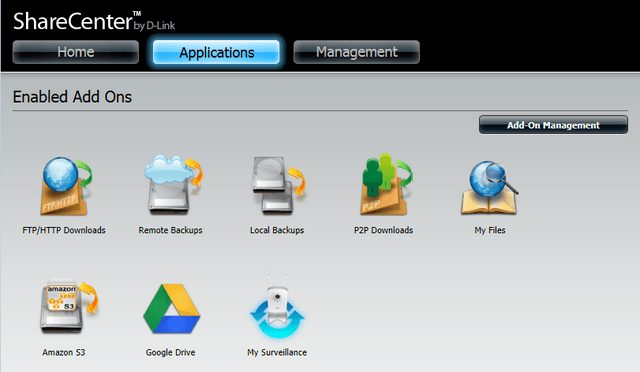
Step 7b – You can also click “Applications”, to get to the NAS’s add ons page. You can also see the “My Surveillance” icon here. Click on it to launch the add on.
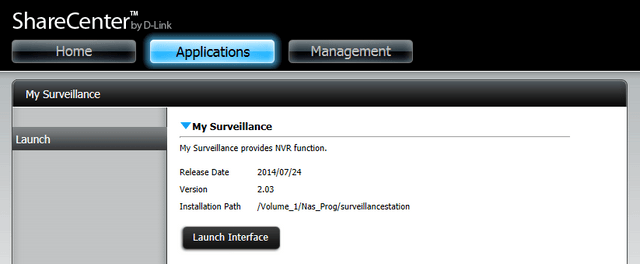
Step 8 – Click the “Launch Interface” button to view the “My Surveillance” system.
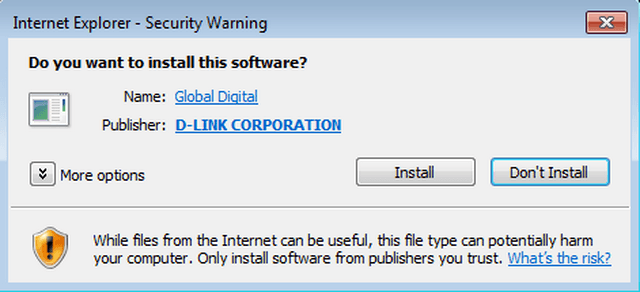
Step 9 – Click to allow the install of the required browser add on.
![]()
Step 10 – Install of the required browser add on.
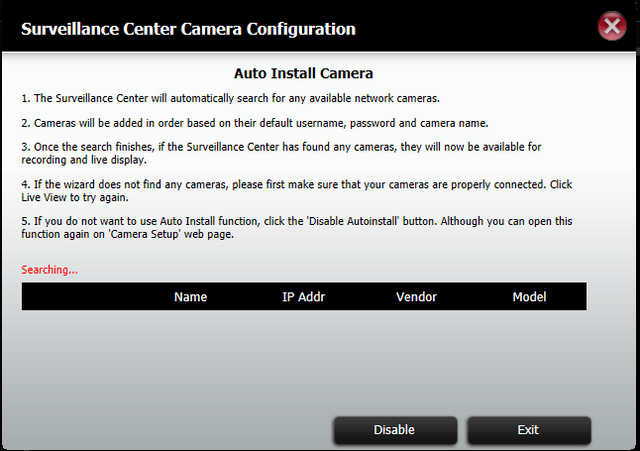
Step 11 – The first time the My Surveillance add on is run, it will search your network for any supported network cameras.
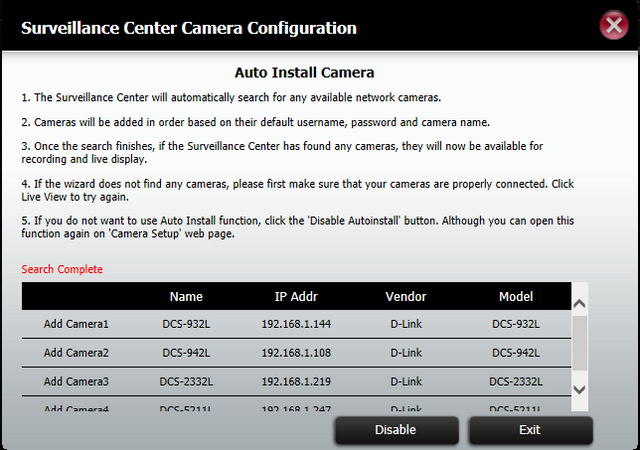
Step 12 – Once the search is complete, it will show a list of any cameras it has found. You can then click “Exit” to exit the search and view your cameras.
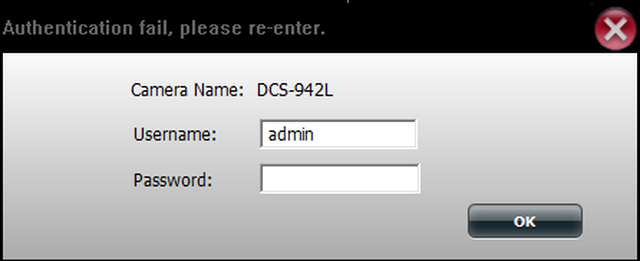
Step 13 – If you have set any passwords on your cameras, you may be prompted to provide the admin password for the camera.
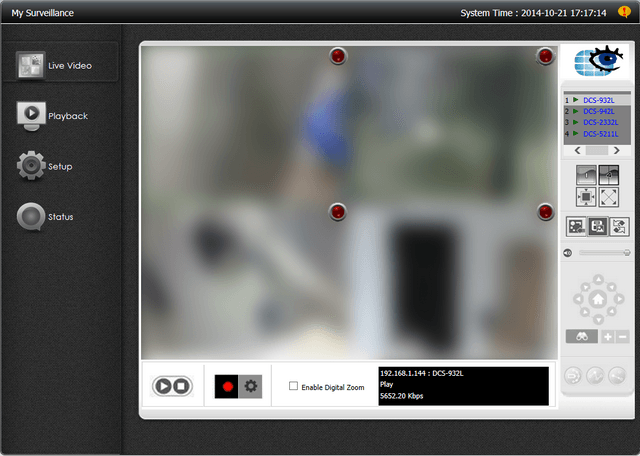
Step 14 – You will then see the main screen of the My Surveillance add on, showing the cameras.
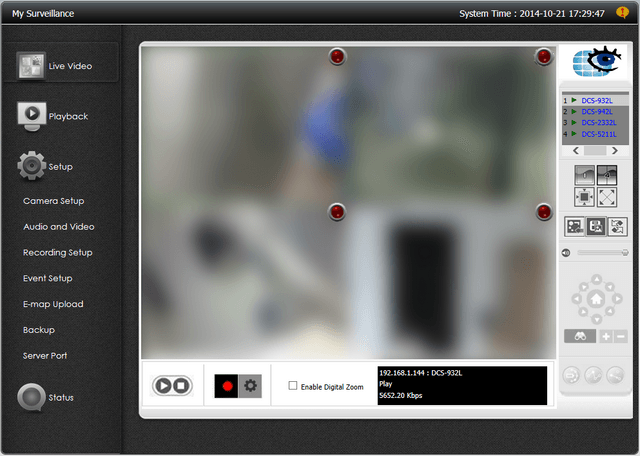
Step 15 – Click “Setup” on the left hand side to access the various setup options.
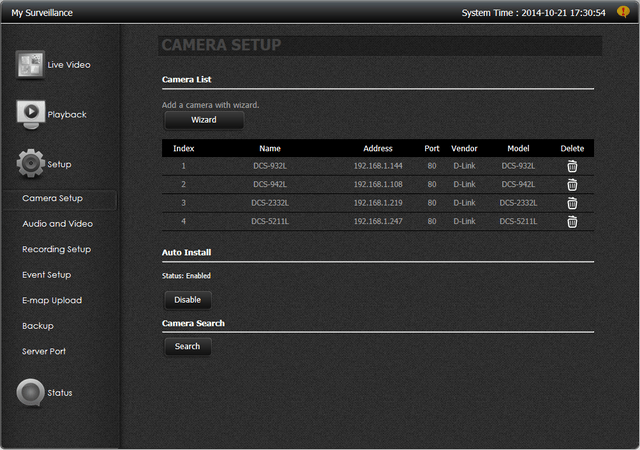
Step 16 – Click “Camera Setup” to alter camera setup parameters.
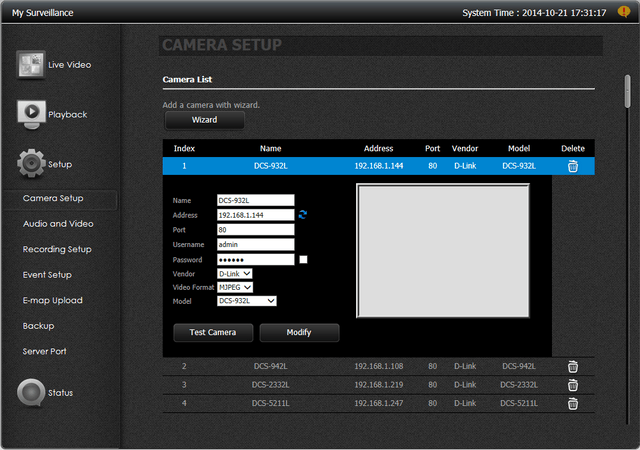
Step 17 – Click on any camera to alter information, such as it’s display name, admin username and password. Click “Test Camera” to confirm the settings are correct.
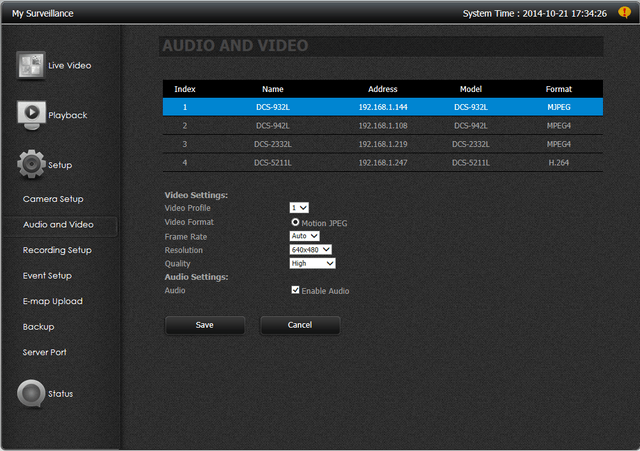
Step 18 – Click “Audio and Video”, then any of the cameras, to alter the video streaming and audio settings.
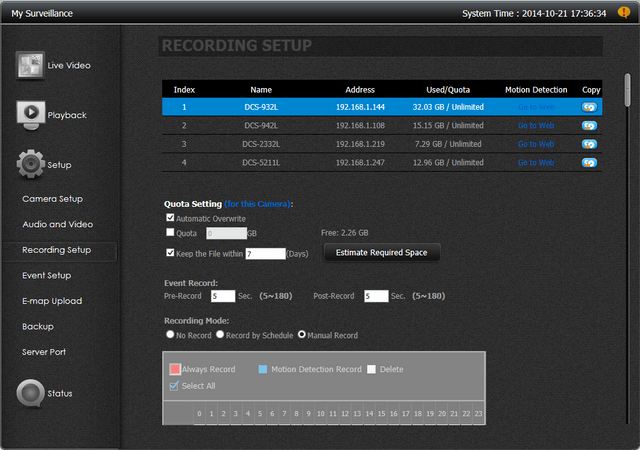
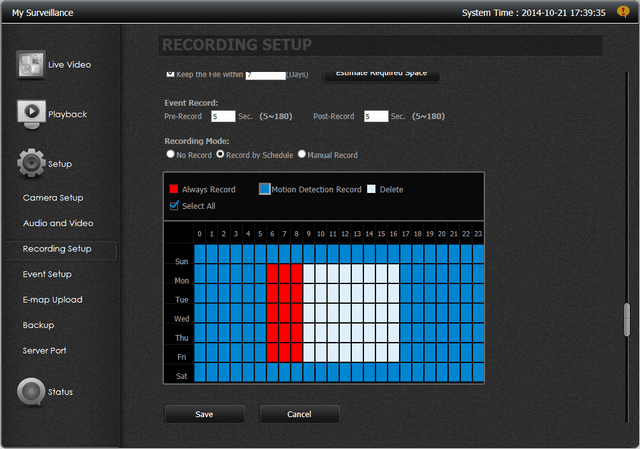
Step 19 – Click “Recording Setup”, then any camera to alter the recording schedule. Here you can alter set a specific disk quota that the camera’s recordings should not exceed, or how many days’ worth of files to keep. Scrolling further down allows you to set the recording mode. When set to “Record by Schedule” you can then set time periods where it will always record (click the red “Always Record”, and drag the sections you want to always record); record only on motion detection (click the blue “Motion Detection Record”, and drag the sections you want to always record); to stop it recording at any time, click the white “Delete”, and drag the sections when you don’t want it to record.
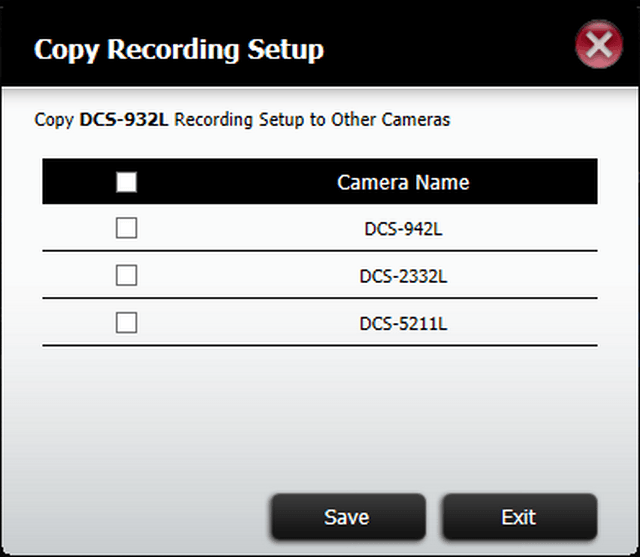
Step 20 – You can copy the recording setup to other cameras by clicking the “Copy” icon next to the camera you want to copy, then select the cameras to copy to.
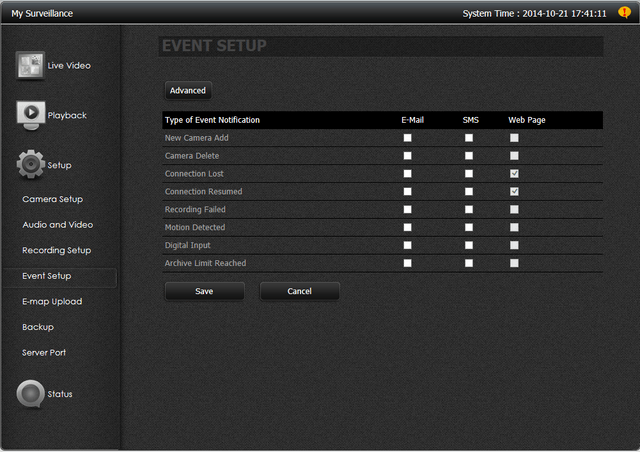
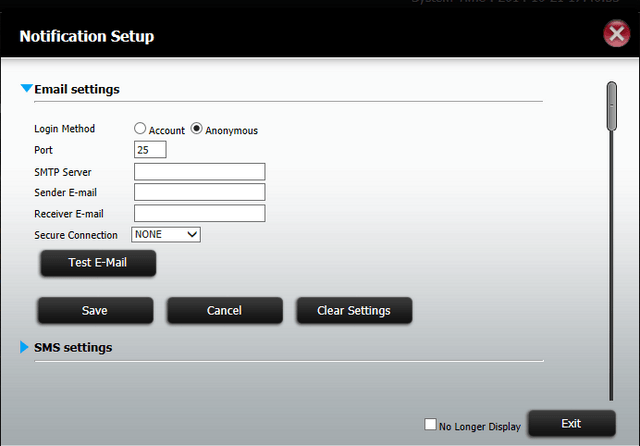
Step 21 – The first time you click on the “Event Setup”, you will be prompted to fill in email or SMS information so the NAS can send email alerts and SMS alerts.
Step 22 – Once completed, you can then select which events you would like to be alerted about via email or SMS.