Camera Mounting Instructions Threaded Mount
Step 1: Place the mount at the desired location, assuring that it is at least 20cm from the ceiling. Use a pencil to mark the holes.

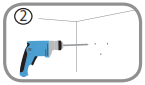
Step 2: Using a 6 mm drill bit, drill two 25 mm deep holes over the pencil marks. For a plaster, dr y wall, or concrete wall, insert the plastic anchors to support the screws first.
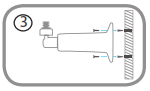
Step 3: Place the mount over the holes that are in the wall. Make sure to align the mount holes with the holes in the wall. Use the supplied screws to attach the mount to the surface of the wall.
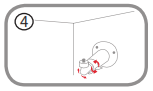
Step 4: Rotate the wing nut counterclockwise with your fingers to slightly loosen it. Then move the bracket to the approximate desired position.
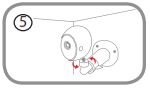
Step 5: S crew the camera onto the mounting screw by tightening the plastic finger nut.
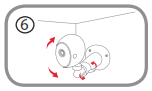
Step 6: Adjust the angle of the arm on the mounting bracket as required.Tighten the wing nut to lock the camera's position into place.