How do I flash the firmware image on the DWL-8610AP using the CLI / Console Cable?
Requirements:
- Computer
- Console cable
- PuTTY (http://www.chiark.greenend.org.uk/~sgtatham/putty/download.html)
- Tftpd (http://tftpd32.jounin.net/) If you have a 64bit PC you MUST download the 64bit server.
Step 1 – Install PuTTY and tftpd server. Run the tftpd server. Cconnect the console cable to the computer and open PuTTY, on the left hand side, select “Serial”, and set the following:
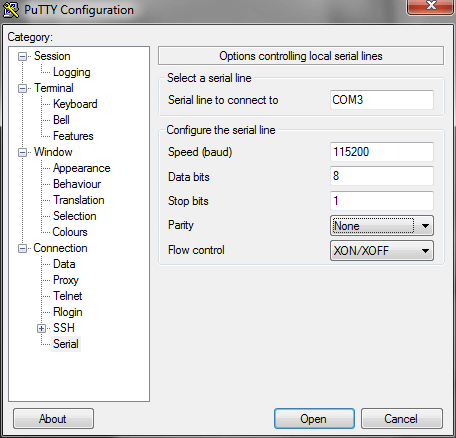
(Please note that the “Serial line to connect to” in this case is an example. You will need to confirm on your own computer what COM port)
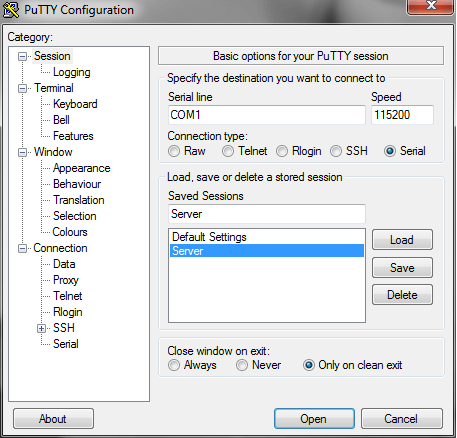
Step 2 – Click “Session” on the left hand side. Select Serial. Change the “Serial line” to the correct COM port. In “Saved Sessions” put a name and click “Save”. Then click “Open”.
Step 3 – Connect the computer to the the DWL-8610AP via the console cable and then connect the power to the DWL-8610AP.
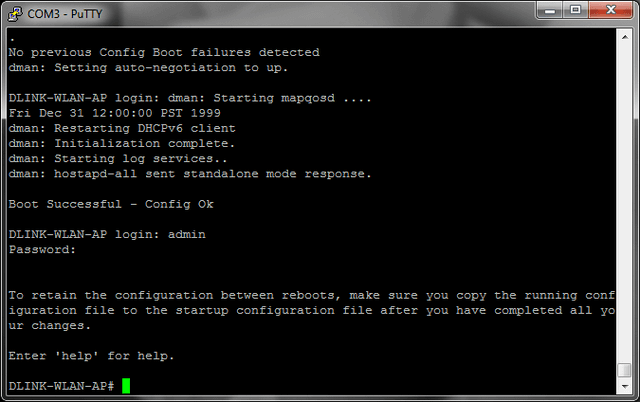
Step 4 – The AP will boot up. Once booted, you will see a login screen.

Step 5 – Login, the default username and password are both “admin”.
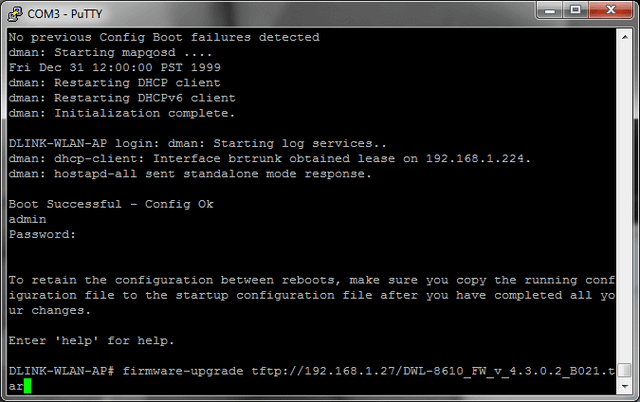
Step 6 – Copy the extracted DWL-8610_FW_v_4.3.0.2_B021.tar file into the tftp server install folder.
Step 7 – Type the following:
DLINK-WLAN-AP# firmware-upgrade tftp://IP_OF_YOUR_COMPUTER/DWL-8610_FW_v_4.3.0.2_B021.tar
(Please note that your computer MUST have an IP address in the same range as that of the AP, in this example the computer has an IP 192.168.1.27)
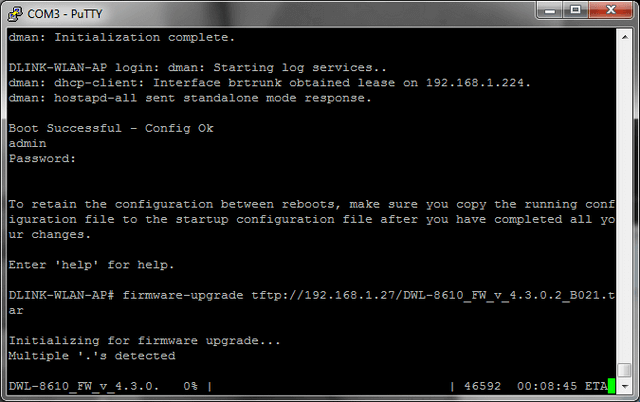
Step 8 – The upgrade process will start, this will take several minutes. Once done, the AP will reboot. You should then re-peat the update process to ensure that both images are updated (the DWL-8610AP is a dual-image device).
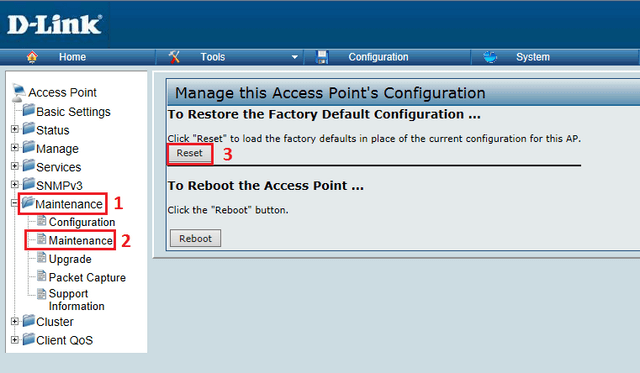
Step 9 – Once the AP has been firmware flashed twice, login to the AP, click “Maintenance”, then click the new “Maintenance” menu item. Here you will need to reset the AP to factory default.