
How to Setup Video Analytics - Intelligent Video Surveillance – DCS-250
System Requirements:
• IVS Counting License
• Camera Resolution and Frame Rate (CIF/15 fps as minimum)
Before you commence with setting up IVS (Intelligent Video Surveillance) it would be advisable to take into the following areas of concern:
• Position and angle of camera
• What type of objects you wish to monitor and count
• Environment conditions
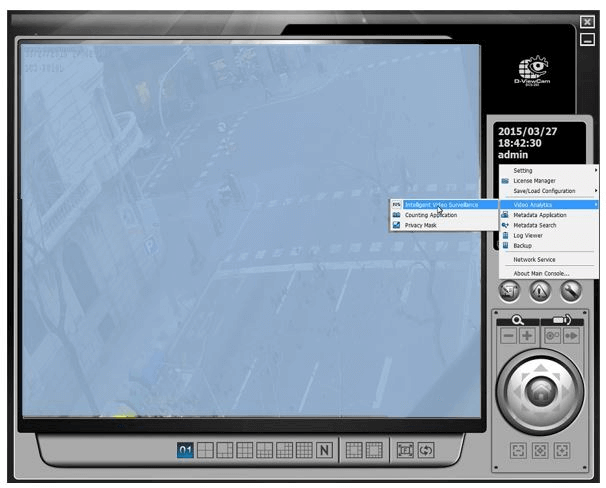
Step 1 – To configure IVS click on the following:
Spanner Icon > Video Analytics > IVS – Intelligent Video Surveillance
Step 2 – You should be prompted to start the “Adv” Service
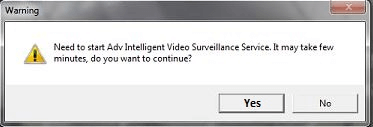
Click “Yes”
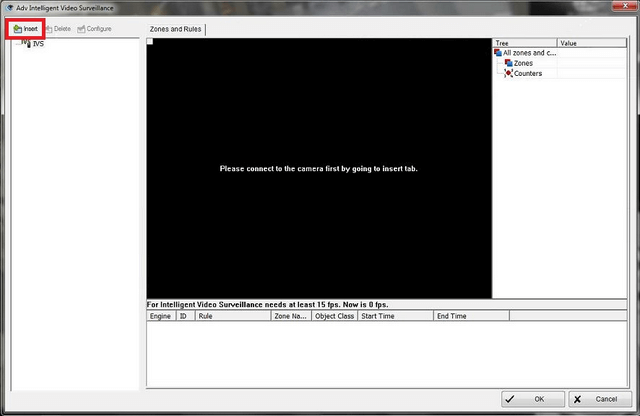
Step 3 – Click on “Insert”
Step 4 – Enter a name. In our example we have chosen “Monitor Traffic” and the device (CAM01 DCS-7010L) the counting license (*) will be bound to
*One License per device
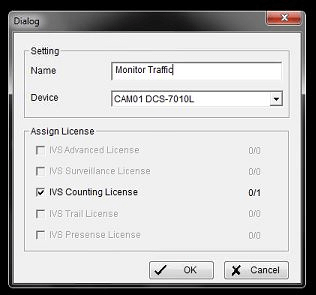
Click “OK”
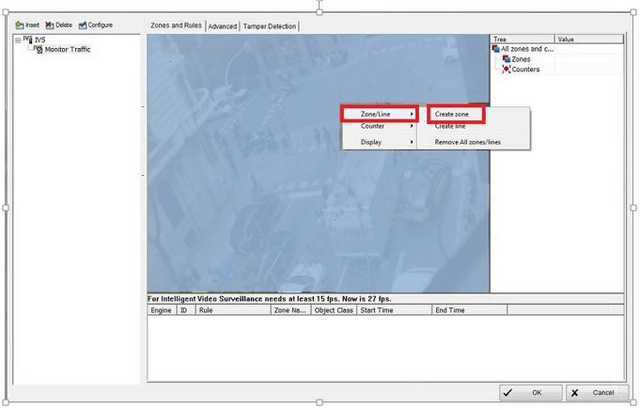
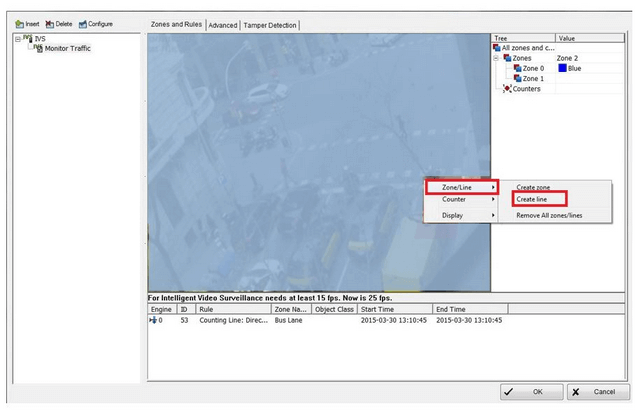
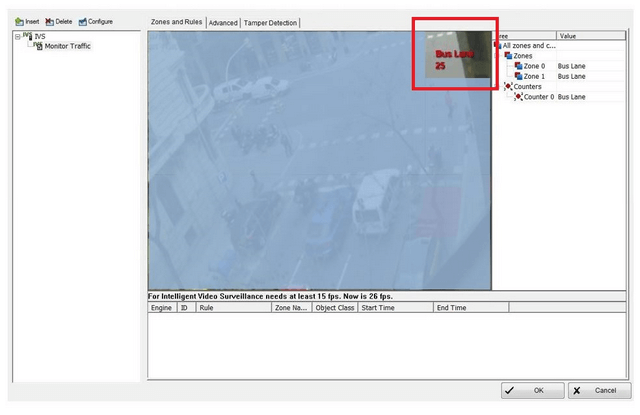
Step 5 – Once the device has been added, you should see the live view of the camera. If not, then please check your settings (i.e. IP address and Password). You must create and define a zone you wish to monitor – To do this, right-click on live view then click “Zone/Line” and “Create zone”
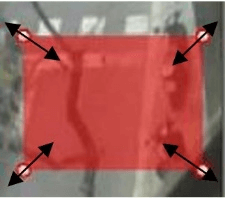
Step 6 – Once you have clicked on “Create zone” a default shape will appear with the capability of being dragged to the desired shape using the mouse. Move it into its final positon
In our example we have added a name to the zone “Bus Lane” so it will be easier to identify and relate to later on. You may also change the colour too but we have left it as default (Red)
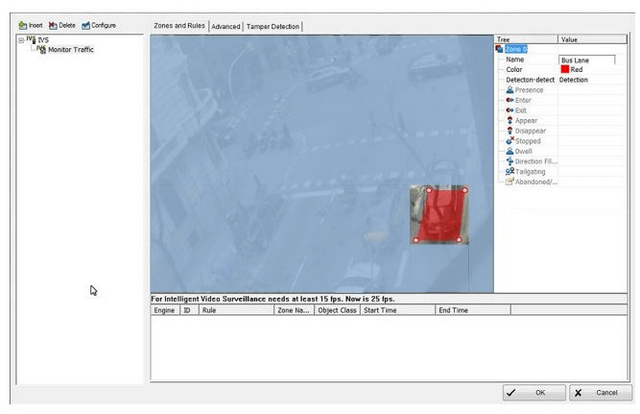
Don’t click on “Ok” and go to Step 7
Step 7 – Click anywhere in the live view to lose focus of the new zone you had created in Step 6 and create a new line - To do this, right-click on live view then click “Zone/Line” and “Create line”
Step 8 – Again you may drag and move the line into the position required
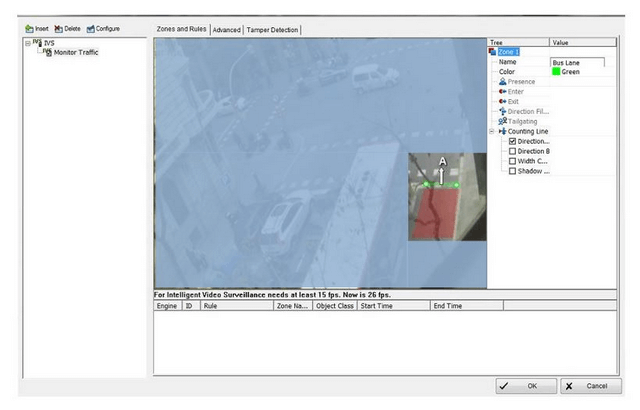
In our example, we have given the same name as the zone “Bus Lane” and set the direction the object will move over for the new line. You will need to define the direction by clicking “Counting Line” and selecting the desired direction. Once you set the direction you should see an arrow with a letter
Don’t click on “Ok” and go to Step 9
Step 9 – Click anywhere in the live view to lose focus of the new line you had created in Step 7 and add counter - To do this, right-click on live view then click “Counter” and “Add counter”
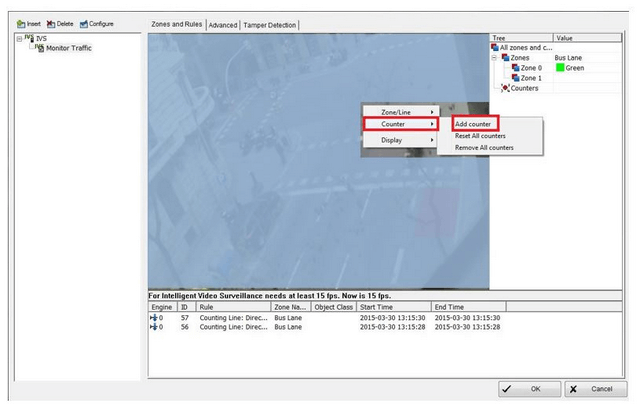
Position the counter on live view to the desired positon and modify as below
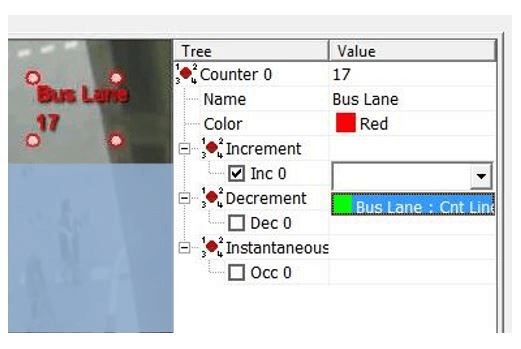
In our example, again we have kept the exercise consistent and given the name “Bus Lane” the same. You will need to associate this counter to the line we created in Step 7. To do this, click on “Increment” then select “Inc 0” and click on the drop-down box. Select the line created, in our example it is: “Bus Lane: Cnt Line”.
Step 10 – You should see the counter increasing in total as when an object passes over the line
Click on “OK” to finalise the configuration
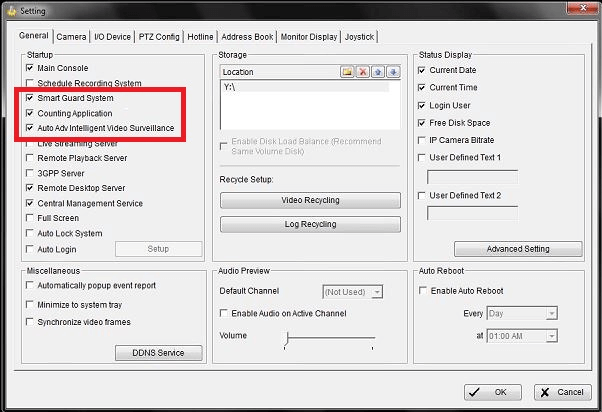
Step 11 – Add the following services to “Startup”. This will ensure every-time you open DCS-250 theses services will be active and running
Spanner Icon > Setting > System Setting > General
Click “OK”
Ti potrebbero interessare anche questi:
- Come attivare licenze in modo Offline - DCS-250 Leggi la risposta
- Come configurare l’Auto Backup con avviso per email – DCS-250 Leggi la risposta
- How to Change the Default Folder and Record to a Mapped Drive – DCS-250 Leggi la risposta
- How to Install Remote Desktop and Run Service – DCS-250 Leggi la risposta
- How to Playback Recordings and Export – DCS-250 Leggi la risposta
- How to Setup Event and Action – Tamper or Obscured View – DCS-250 Leggi la risposta
- How to Setup Event and Action with PTZ Camera – DCS-250 Leggi la risposta
- Come impostare Motion Detection - DCS-250 Leggi la risposta
- Come impostare Privacy Mask - DCS-250 Leggi la risposta
- How to Setup a Recording Schedule based on Motion Detection and Record to a NAS – DCS-250 Leggi la risposta