
How do I set an iSCSI drive on my DNS-1550-04 and connect to it?
Step 1: Log in to your device. On the top navigation bar, click Storage.
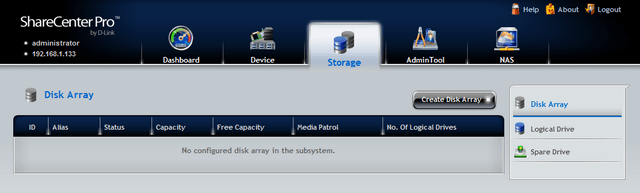
Step 2: If you do not already have a Disk Array, you can create one. If you do have one setup, and do not wish to create another, please skip to Step 5.
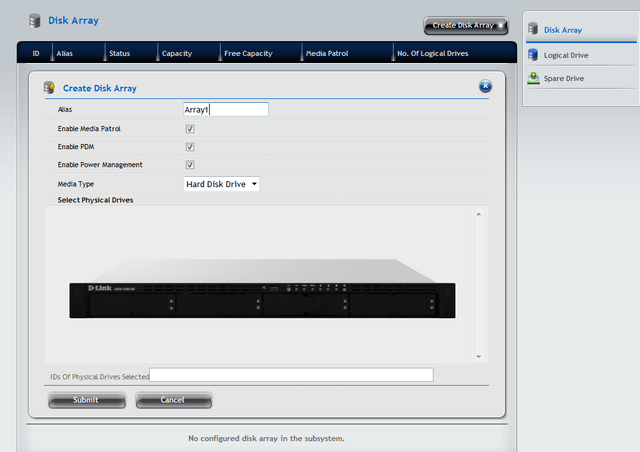
Step 3: Click Create Disk Array. Give it an alias, leave all other settings as default.
Select which hard drives you want to add into the array, by clicking the appropriate drive bay(s). Click Submit. Then click Confirm. This will create the Disk Array.
Step 4: After the Disk Array is created, click Finish.
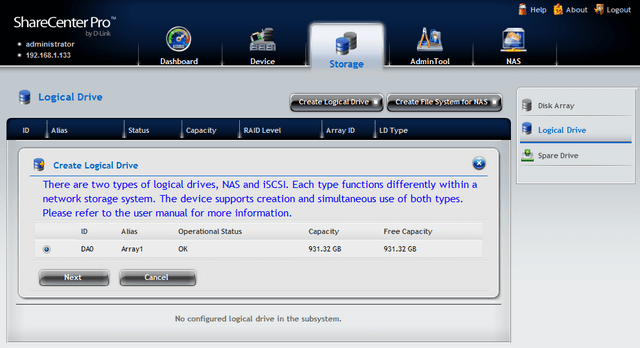
Step 5: On the right hand menu, click Logical Drive. If you have not configured any Logical Drives yet, you will see a screen as below. If there are existing Logical Drives, these will be displayed here.

Step 6: Click Create Logical Drive. If you have multiple Disk Arrays created, select the Disk Array you want to create this new Logical Drive on. If you only have one Disk Array, this will be selected by default. Click Next to continue.
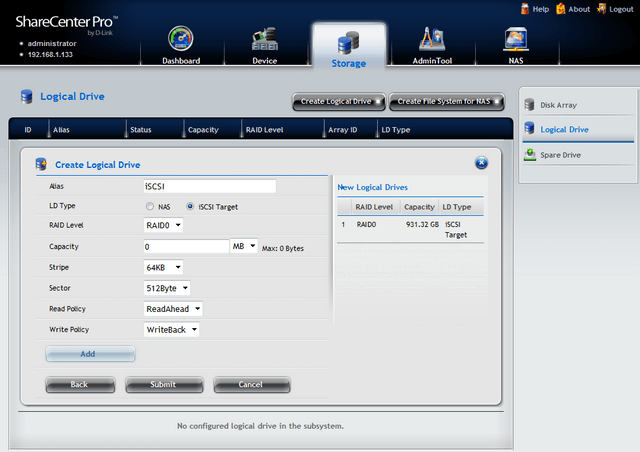
Step 7: Here you can provide an Alias for this Logical Drive. You should ensure to select iSCSI Target as the LD Type. Change the RAID Level to suit your needs, and set the Capacity to your desired space. You should leave the remaining settings as the default. Click Add.
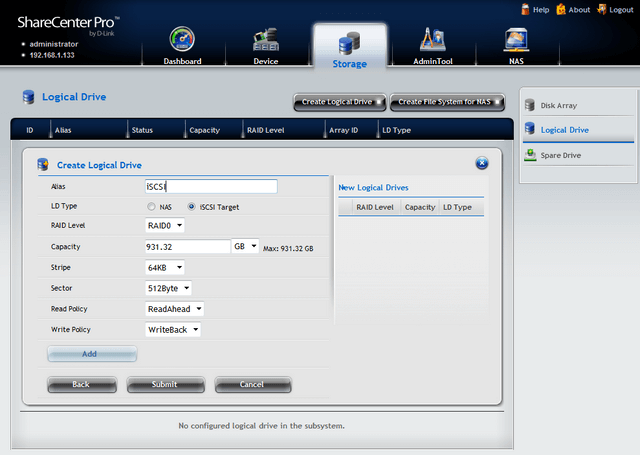
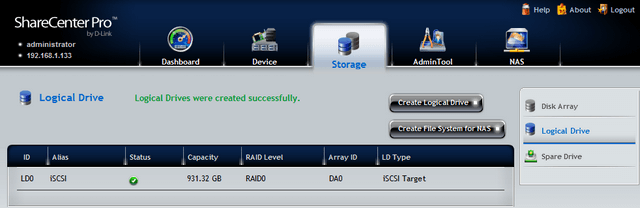
Step 8: You will now see the Logical Drive appear on the right hand side. If you wish to create more Logical Drives, you can repeat Step 7 again. If you are finished, click Submit.
Step 9: If you want to limit connections to this iSCSI Target to just one machine, then you can follow these steps, otherwise you can skip to Step 10. This document shows how to limit to the connection to a Windows 7 machine.
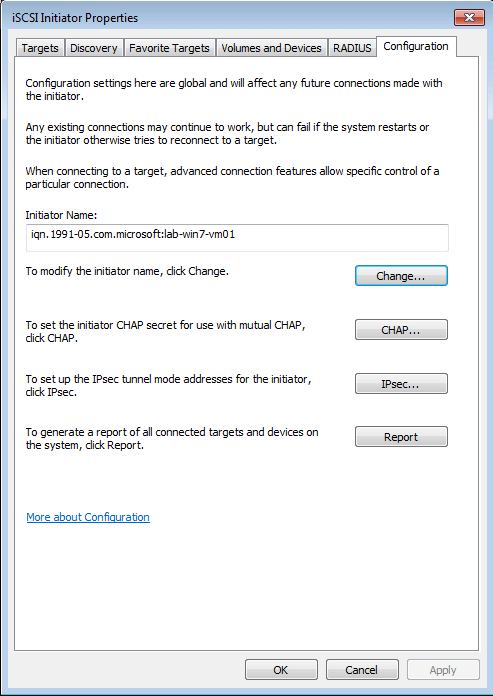
Step 9-1: On your computer, open Control Panel. Then open Administrative Tools. Open iSCSI Initiator then click the Configuration tab. Copy the Initiator Name.
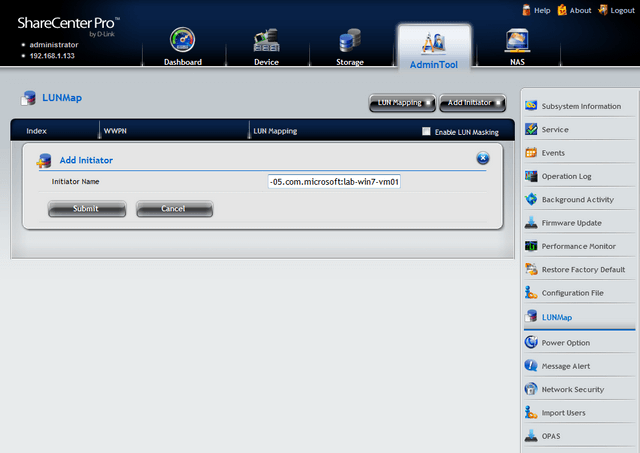
Step 9-2: Back in the NAS, on the top menu bar, click AdminTool. From the right hane menu, click LUNMap. Click Add Initiator. Here, you should paste the name you copied in Step 9-1. Click Submit.
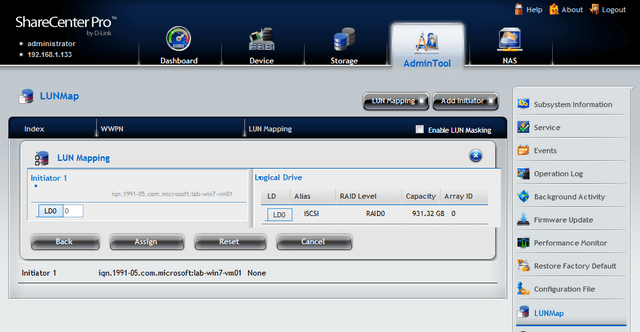
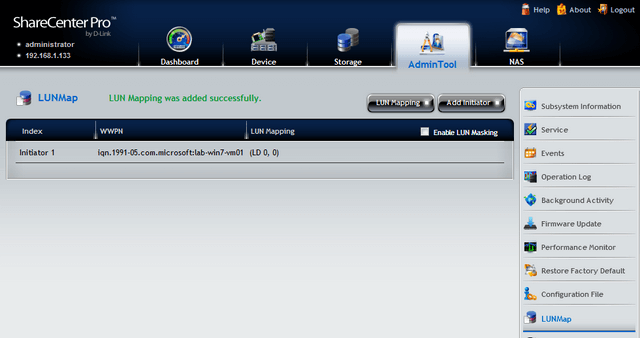
Step 9-3: Click LUN Mapping. Select the Initiator you have just added in Step 9-2, then in the box that appears, drag the LD of the Logical Drive you want to the left hand side, under Initiator. Click Assign.
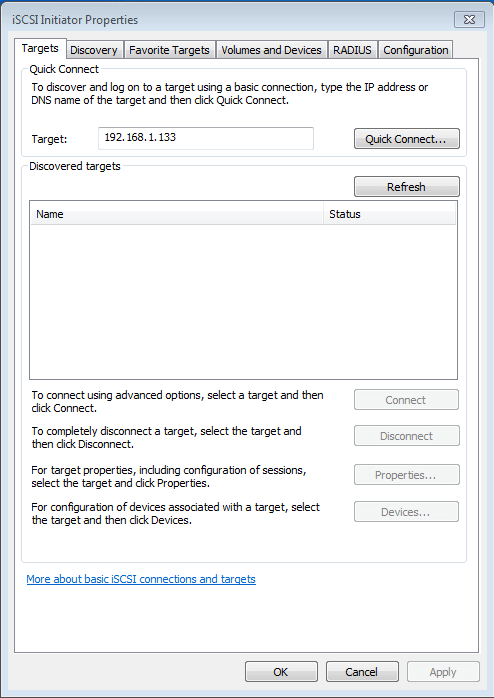
Step 10: Switch back to the iSCSI Initiator tool in windows. Click the Targets tab. In the Target field under Quick Connect type the IP address of the NAS. In this example the NAS is 192.168.1.133. Click Quick Connect…
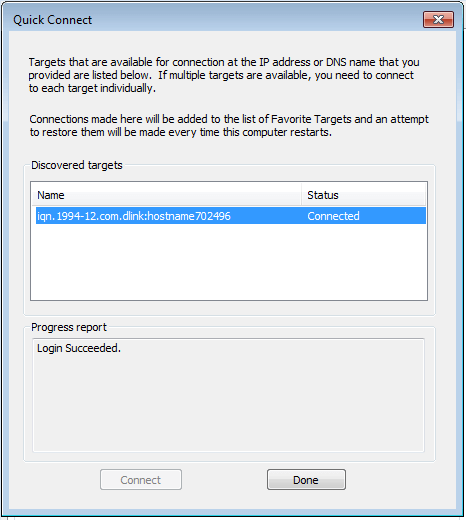
Step 11: The new box should show the name of the NAS and show you are it is connected. You can click Done. And close the iSCSI Initiator tool.
Step 12: In the Administrative Tools window, open Computer Management. From the left hand menu, click Disk Management.
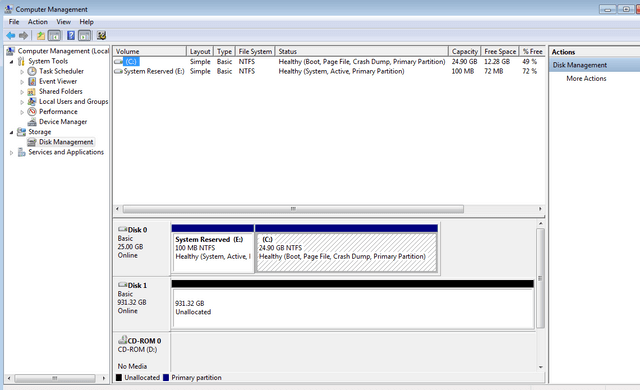
Step 13: You can now format the new unallocated disk as required, and assign it a specific drive letter.