
How do I set up and install my DCS-2330L?
Step 1: Download the install wizard for your camera from http://eu.mydlink.com/support
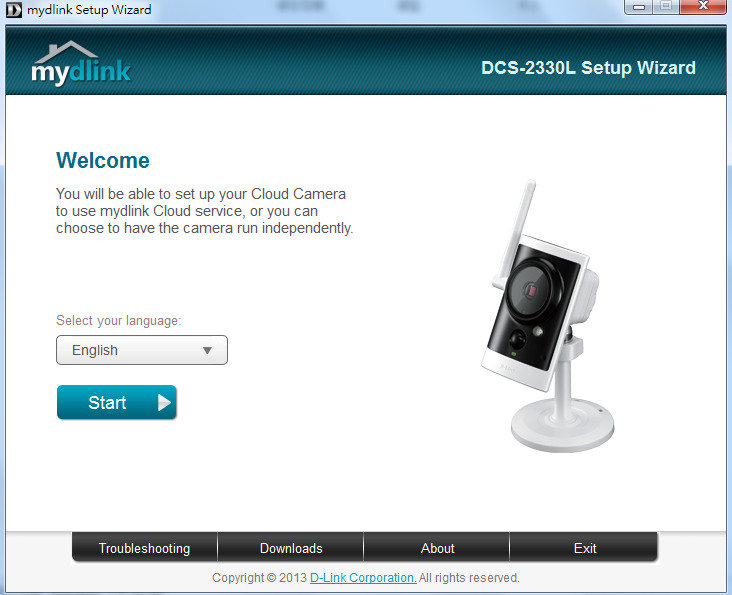
Step 2: Launch the install wizard:
- Step 2.1: Select a language from the drop-down menu and click Start.
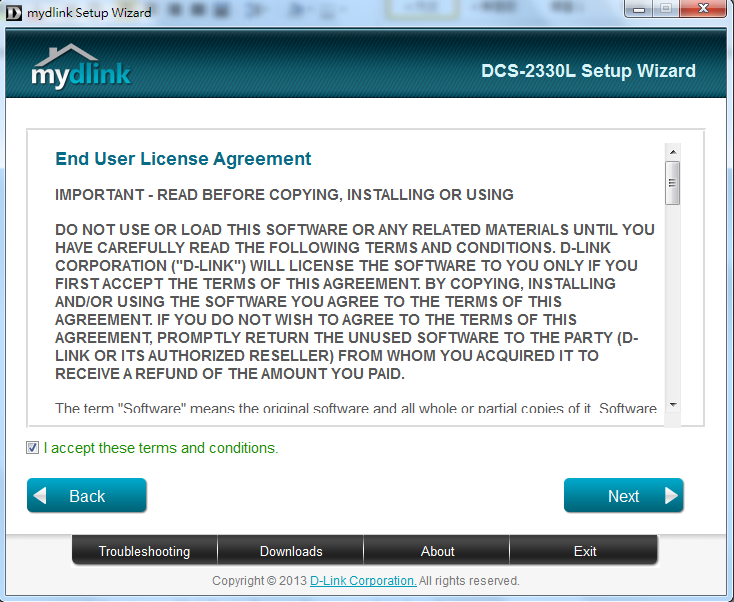
- Step 2.2: Accept the End User License Agreement by checking the box next to “I accept these terms and conditions”, then click Next.
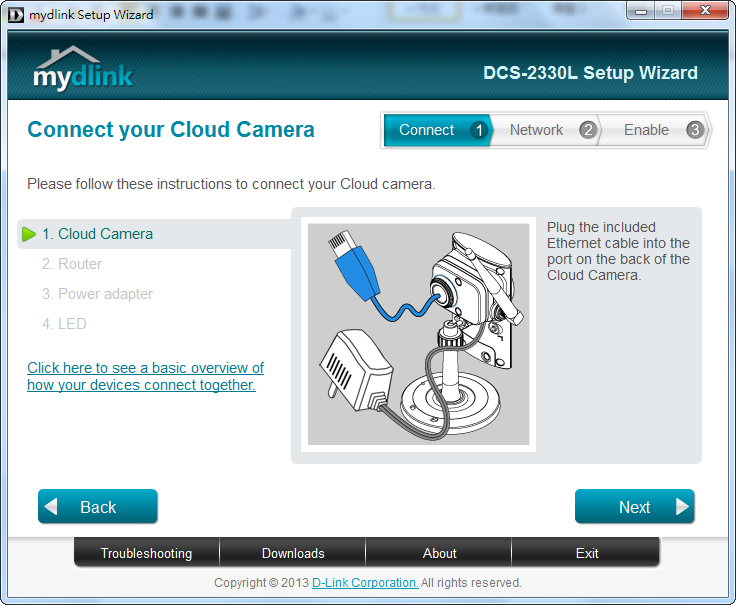
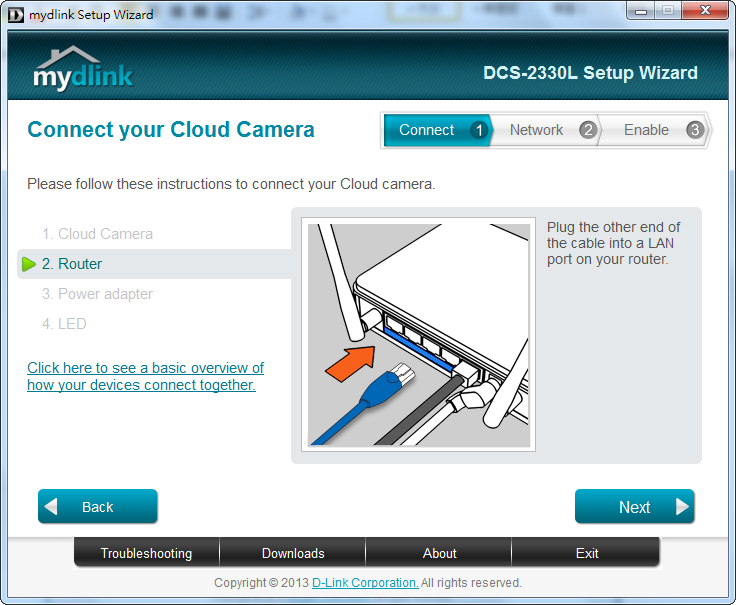
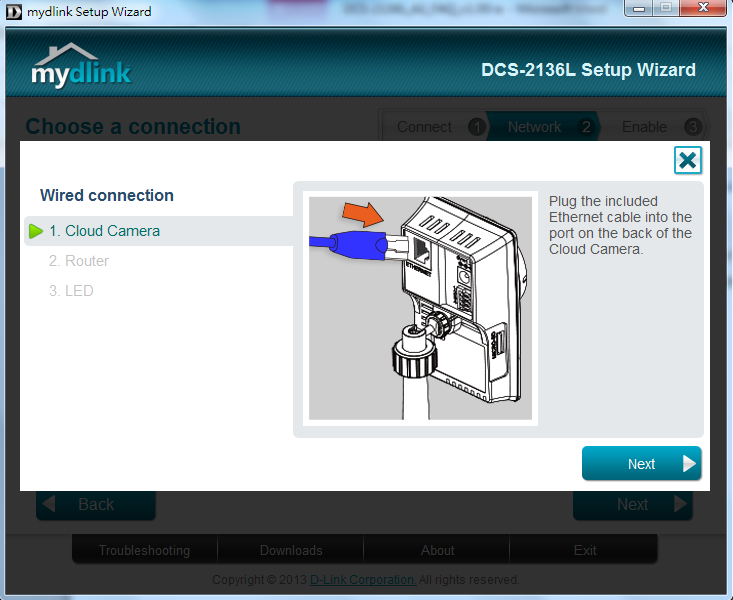
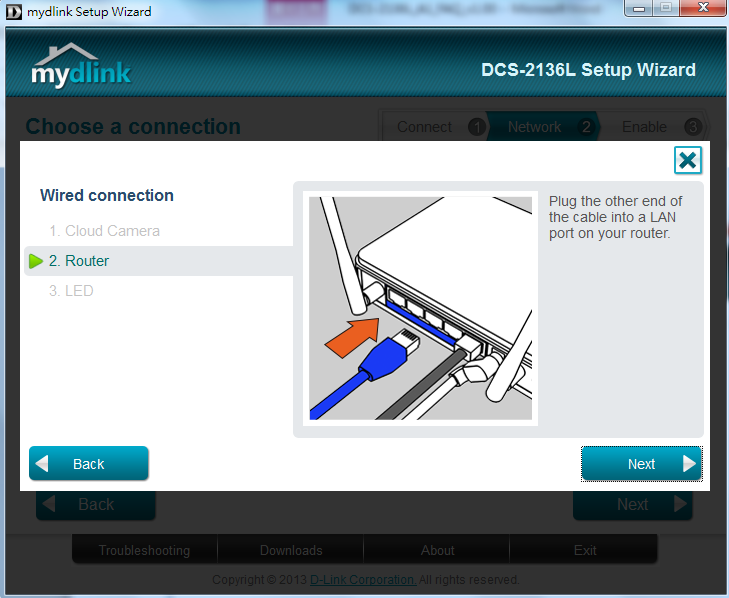
- Step 2.3: Follow the on-screen instructions to connect your camera to your router and connect the power. Click Next after you have completed each step.

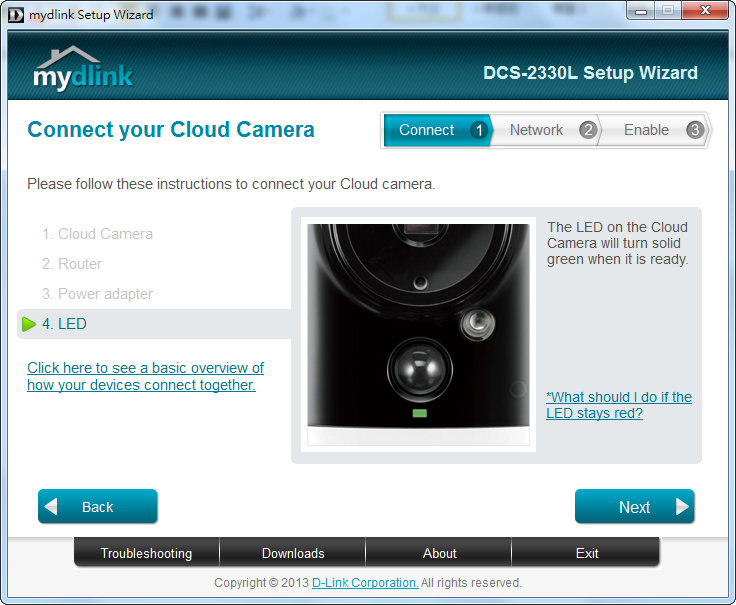
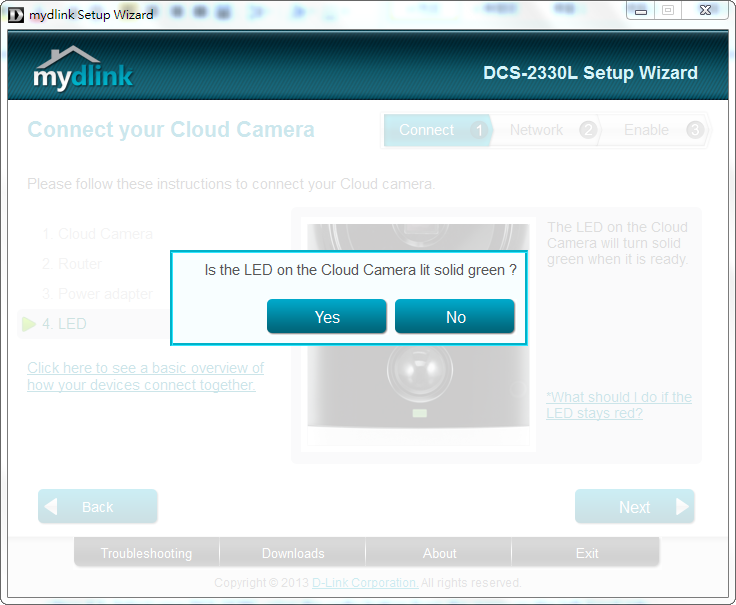
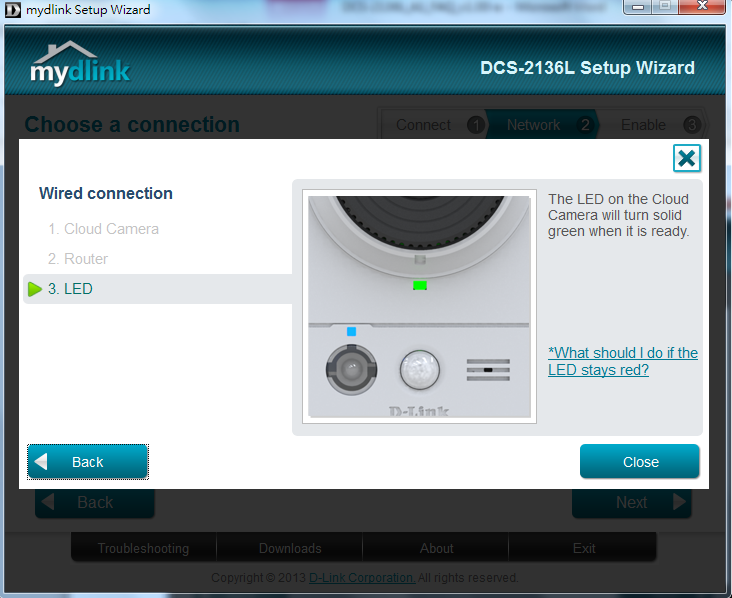
- Step 2.4: Confirm that the LED on the front of the camera is lit solid green.
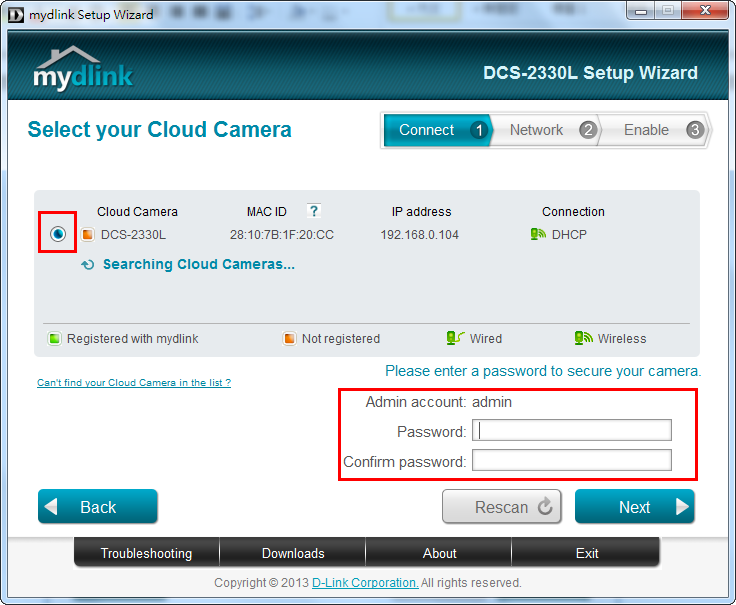
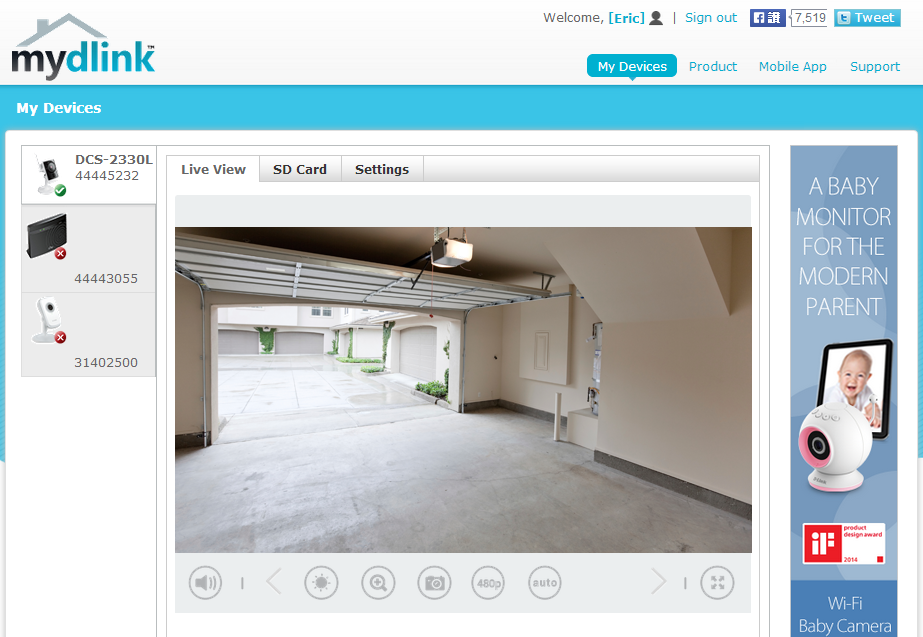
Step 3: Select your DCS-2330L using the radio button from the menu on the left-hand side of the camera name. Enter and confirm a password for the Administrator account in the fields provided. This password will be required when logging in to the camera’s web-based configuration interface. Click Next to continue.
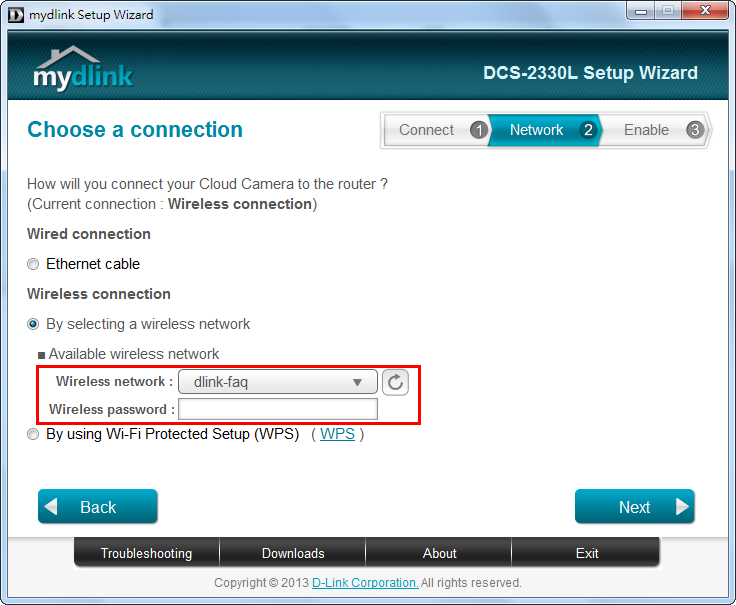
- Step 4.1: Using the radio buttons, select how you wish to connect your camera to your router for normal operation. You can choose to connect using wired connection (Ethernet cable), or a wireless connection by using Wi-Fi Protected Setup (WPS), or manually by Selecting a wireless network. Choose the appropriate radio button for your configuration, and click Next to continue.
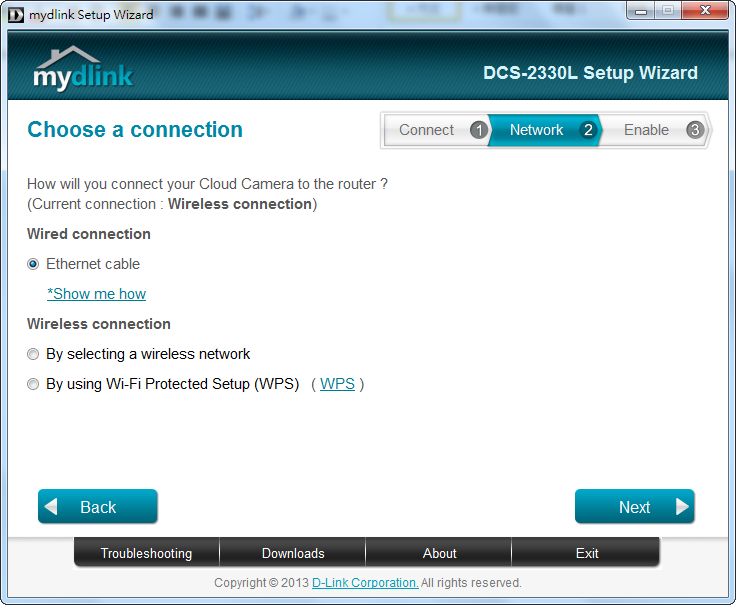
- Step 4.2: If you selected Ethernet cable connection, follow the on-screen instructions to ensure that your camera is connected to your router using an Ethernet cable. Once completed, click Next to continue the wizard.
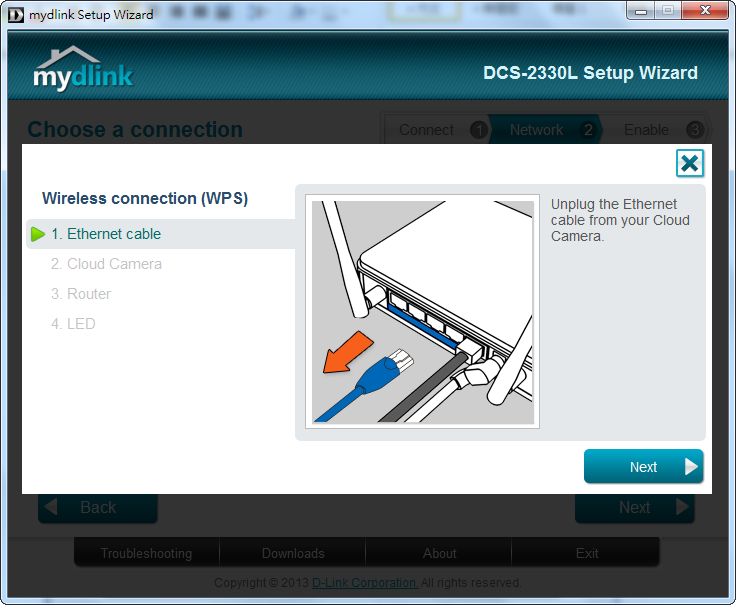
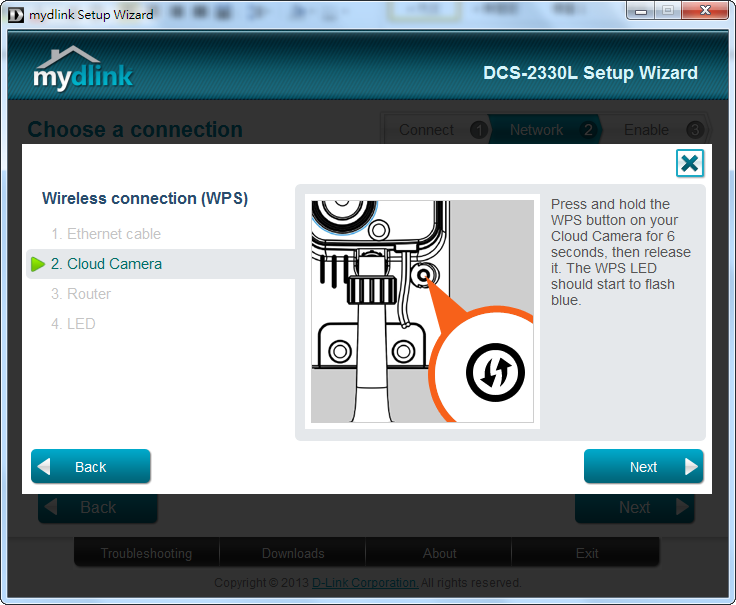
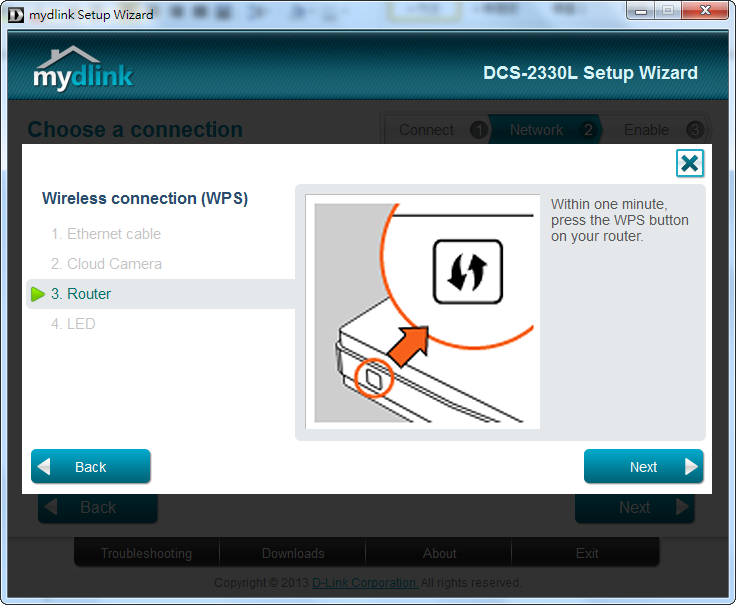
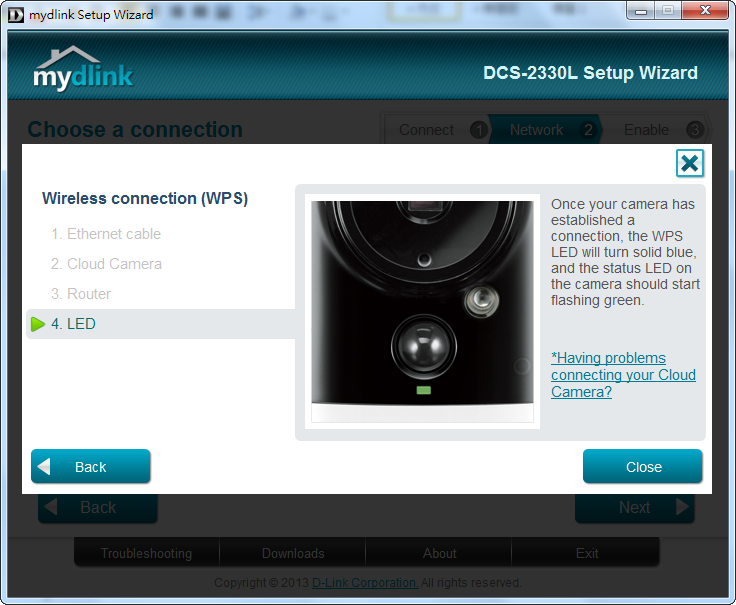
- Step 4.3: If you selected By using Wi-Fi Protected Setup (WPS), follow the on-screen instructions to connect your camera to your wireless router using WPS. Once completed, click Next to continue the wizard.
Note: Your router must support WPS Push-button Connection (PBC) in order to use this method.
- Step 4.3: If you selected By selecting a wireless network, choose an available wireless network from the drop-down menu. If you do not see your wireless network in the list, click Rescan to search for wireless networks again. If your network requires a password, enter it in the Wireless password field. Click Next to continue.
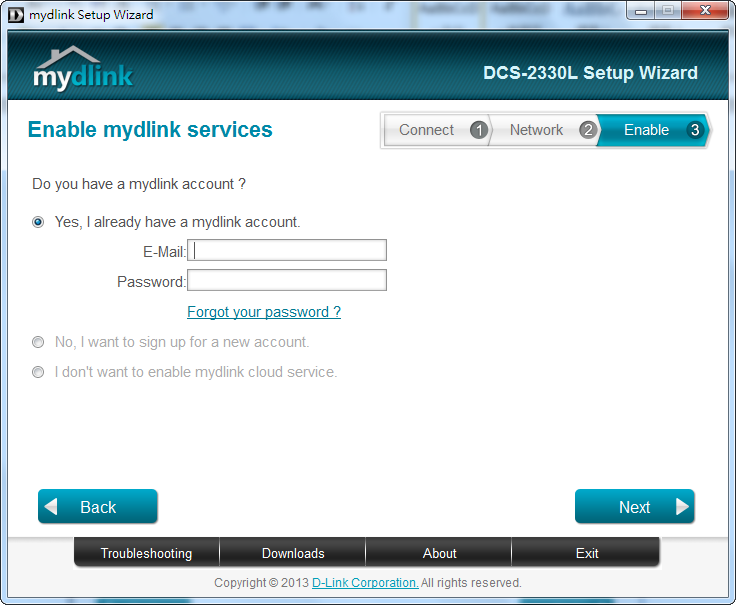
- Step 5.1: In order to use the cloud features of your camera, you will need to register it with your mydlink account. If you do not have a mydlink account, you can create one during this step.
To add the DCS-2330L to your existing mydlink account, select Yes, I already have a mydlink account, then enter your mydlink account username (email address) and password in the fields provided and click Next.
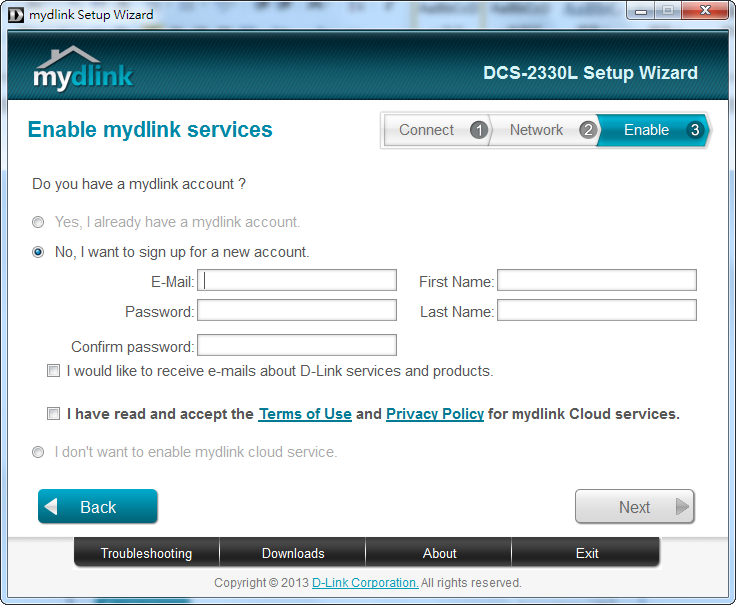
- Step 5.2: If you selected No, I want to sign up for a new account, enter the information required for account registration in the fields provided. Check the box to indicate that you have read the Terms of Use and Privacy Policy for mydlink Cloud Services. Click Next to continue.
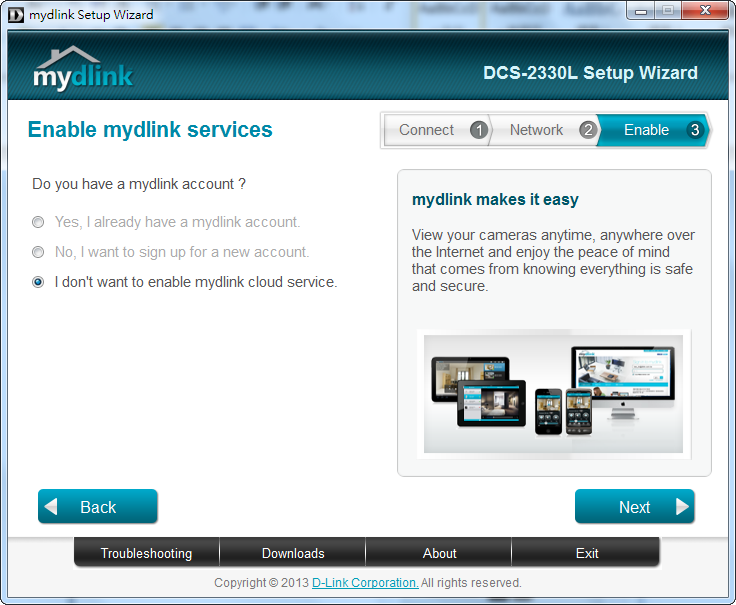
- Step 5.3: If you do not wish to use the mydlink service, select I don’t want to enable mydlink cloud service. You will not be able to use any of the cloud features associated with your camera. Click Next to continue.
Step 6: Setup is complete. A summary page with display your camera’s setup details, as well as your mydlink account information. Click Finish.
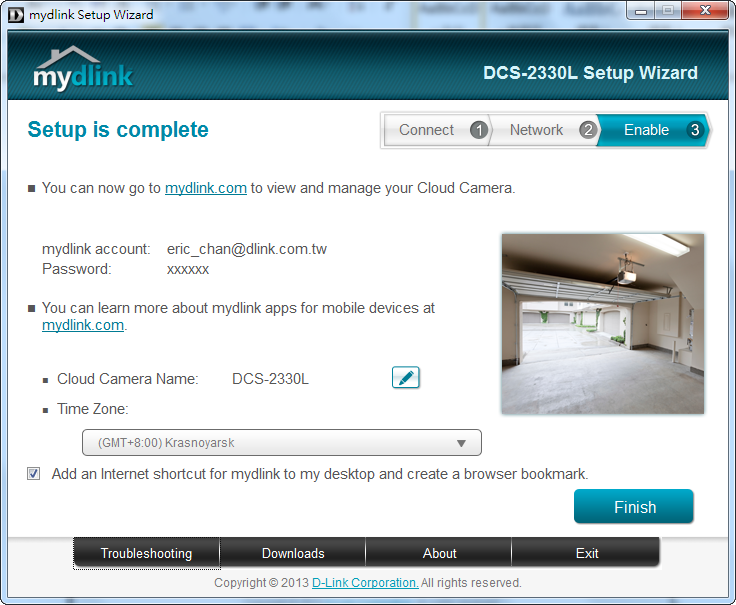
Step 7: You can now log in to your mydlink account to view and manage your DCS-2330L by visiting http://eu.mydlink.com
Ti potrebbero interessare anche questi:
- How do I access my mydlink camera remotely? Leggi la risposta
- How do I change the LAN IP address of my camera? Leggi la risposta
- How do I configure motion detection on my camera? Leggi la risposta
- How do I configure the audio settings (microphone) on my DCS-2330L? Leggi la risposta
- How do I find the IP address of my DCS-2330L and access the web-based user interface? Leggi la risposta
- How do I manually upgrade the firmware on my camera? Leggi la risposta
- How do I mount my camera to the wall or ceiling? Leggi la risposta
- How do I set an administrator (admin) password on my DCS-2330L? Leggi la risposta
- What if I forget the Admin password for my camera? Leggi la risposta
- Which types of motion detection are available on my IP camera? Leggi la risposta