
How to Setup the DHP-(P)308AV Powerline Mini Adapter?
Installation Considerations Powerline:
• Plan the location of Powerline devices
• Connect the Powerline devices to electrical outlets that are not controlled by a wall switch to prevent accidental turn off power to the device.
• Do not connect the Powerline devices to an extension cord, surge protector or power strip, as this will prevent it work
Correctly or reduce network performance.
• Avoid using the Powerline devices into an electrical outlet located near a device that uses a lot of energy, such as a washer, dryer or refrigerator. This could prevent the adapter to function properly or have a negative impact on network performance.
• This device cannot be managed or setup using Web GUI.
• This device cannot be found by the Powerline Utility.
Once all of the above have been considered, we can commence with the configuration
This documentation is common to both DHP-308AV and DHP-P308AV. For this reason we’ll use the reference DHP-(P)308AV.
What comes with the box?
• PowerLine DHP-(P)308AV Powerline Mini Adapter x2
• Quick Install Guide and Warranty Documents
• CD/ROM with user manual
• Ethernet RJ45 CAT5x2 Cable x2
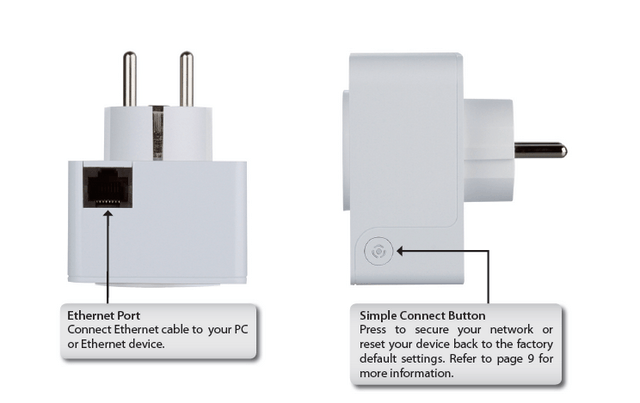
Overview of hardware:
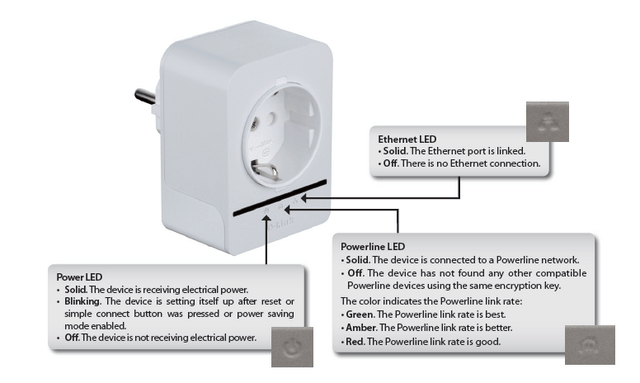
Step 1 – Insert one DHP-(P)308AV into a wall socket near to your router or at least within a distance for the RJ45 Cable supplied to be connected. Wait until the power LED is a FIXED green light.
Step 2 – Insert into one port of your router an Ethernet RJ45 Cable and the other end into the DHP-(P)308AV
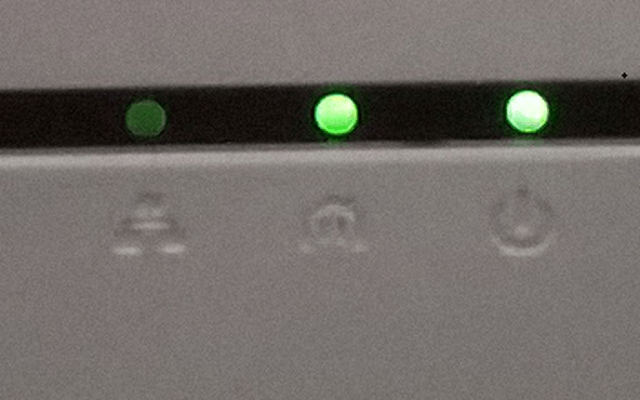
Step 3 – Once connected you should be seeing the following LEDs
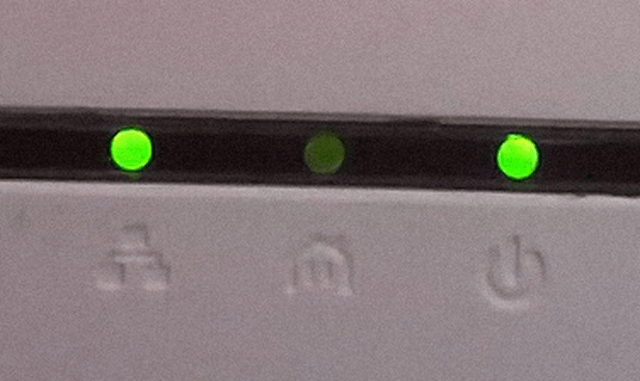
These mean that there is Power Supplying the DHP-(P)308AV and also there is Ethernet Connectivity with the router
Step 4 – To ensure there will be a Powerline connection between the 2 devices, insert the second DHP-(P)308AV into a wall socket near the first.
Step 5 – Press and hold the "Simple Connection Button" for 2 seconds on both devices. You will notice their "Power LED” flashing. Once the "Power LED” has stopped flashing, you should see the following LED formation on the first DHP-(P)308AV:
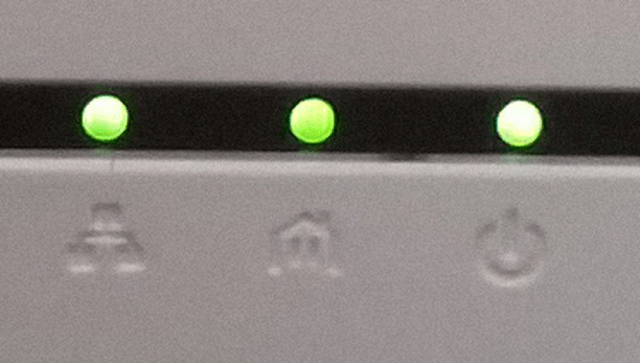
This will mean that there is Power Supplying the DHP-(P)308AV, Powerline Connectivity and also Ethernet Connectivity with the router.
On the second DHP-(P)308AV you should see the following LED formation:
This will mean that there is Power Supplying the DHP-(P)308AV, Powerline Connectivity but no Ethernet Connectivity.
Step 6 – To test the connectivity, connect one end of the second Ethernet CAT5 cable into the second DHP-(P)308AV and connect to a PC, laptop or MAC. Configure the PC or laptop to receive an IP from the router by the following steps
Step 7 – Change Network Adapter:
Microsoft Windows:
Start > Control Panel > Network and Sharing Center > Change adapter settings > Local Area Connection – right-click on this icon > Properties – select and double click on > Internet Protocol Version 4 (TCP/IPv4)
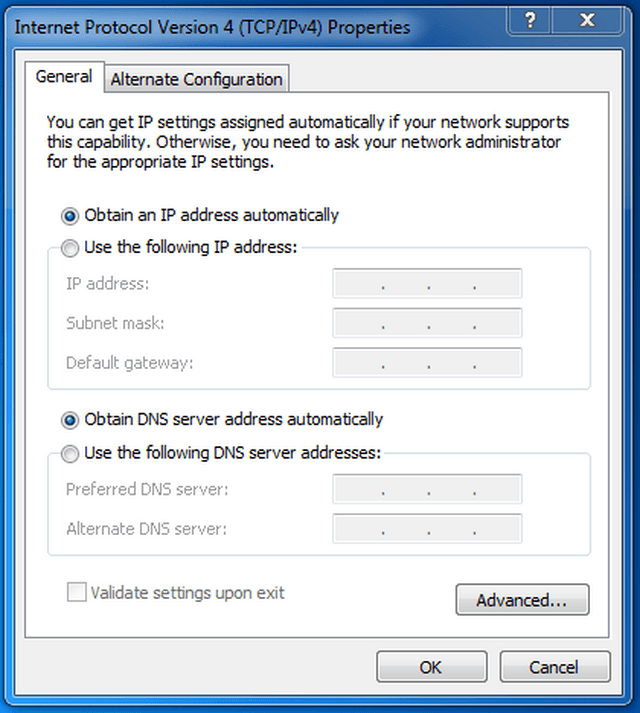
The above settings are ideal for receiving an IP from the router. Once you know your network details, you may change them to a static IP.
MAC OS:
System Preferences > Network > Network and Sharing Center > Change adapter settings > Local Area Connection
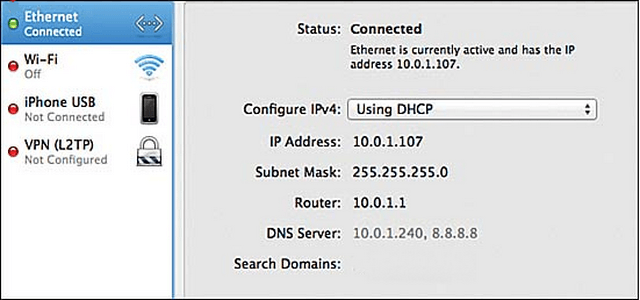
The above settings are ideal for receiving an IP from the router. Once you know your network details, you may change them to a static IP.
Step 7 – When connection is made, you will see the following LED formation:
Step 8 – You may now put the second DHP-(P)308AV in another location of the house