
How to Upgrade Firmware DGS-1510-Series - CLI
Requirements:
Firmware: DGS-1510_Run_1_20_B013(0417145727).had (used in this example)
PuTTY: http://www.chiark.greenend.org.uk/~sgtatham/putty/download.html
Tftp Server: http://tftpd32.jounin.net/tftpd32_download.html
Choose the “Standard Edition” for either 32Bit or 64Bit OS
Note: Please always remember to check if there are new firmware updates by going to our website:
http://www.dlink.com/uk/en/
Once you have downloaded the correct firmware and installed the above mentioned software, please continue to Step 1
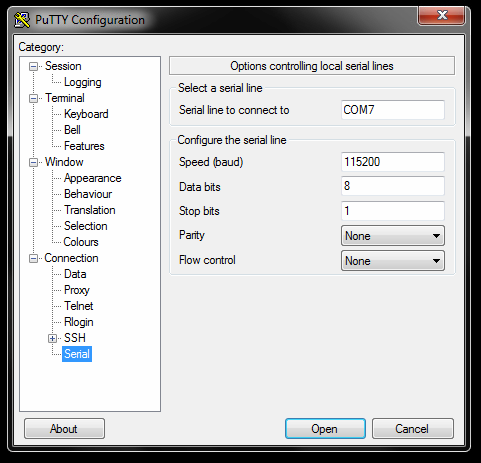
Step 1 – Connect to console port of DGS-1510-Series and configure PuTTy as follows:
Note: COM7 is used in our example, however it may be different on you PC/Laptop. (To check this, you will need to go to Device Manager)
Step 2 – Once configured, click on “Session” and enter a name in “Saved Sessions”. Click “Save” then “Load”
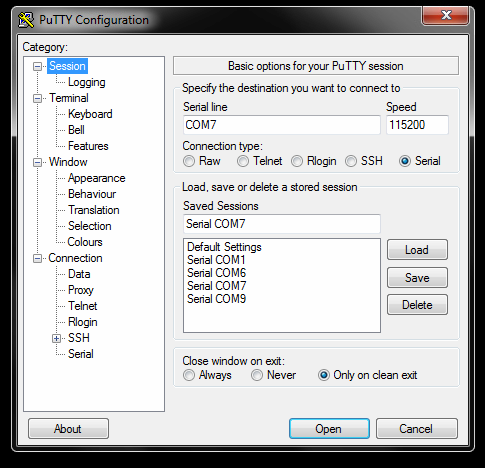
Click “Open”
Step 3 – Once loaded, hit the enter key and create a user
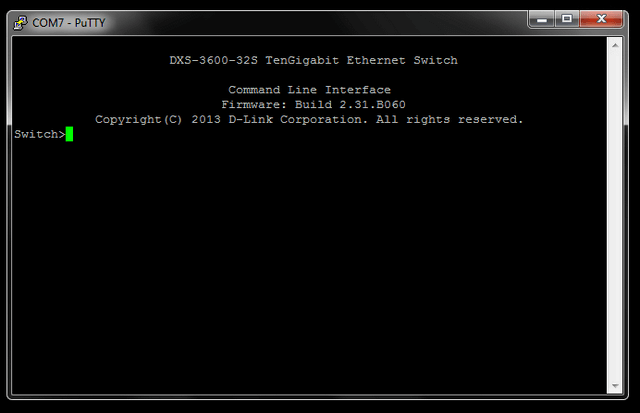
Switch>enable
Switch#configure terminal
Step 4 – Create user with correct privileges
(If you have already done this please go to Step 5)
Switch(config)#username admin password admin
Switch(config)#username admin privilege 15
Switch#copy running-config startup-config
Destination filename startup-config? [y/n]: y
Saving all configurations to NV-RAM.......... Done.
Switch#end
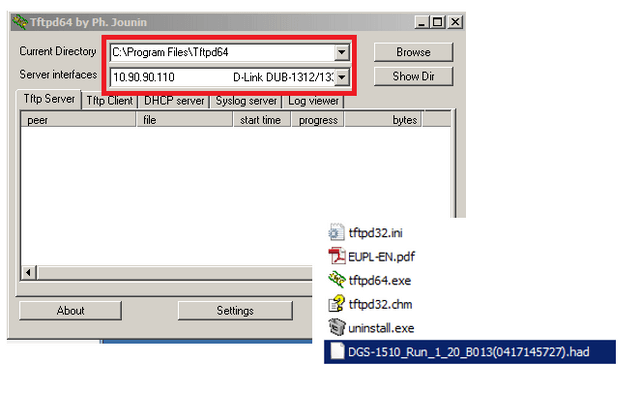
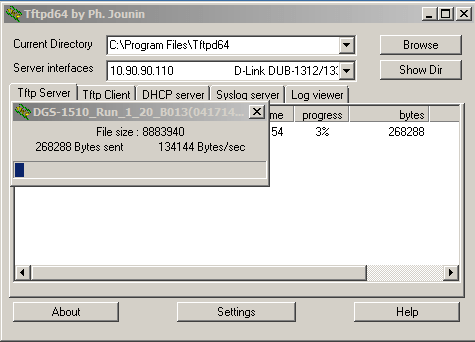
Step 5 – Open tftp server and transfer files to root directory:
Current Directory: C:\Program Files\Tftp64
Server interfaces: 10.90.90.110 (This is where the tftp server resides)
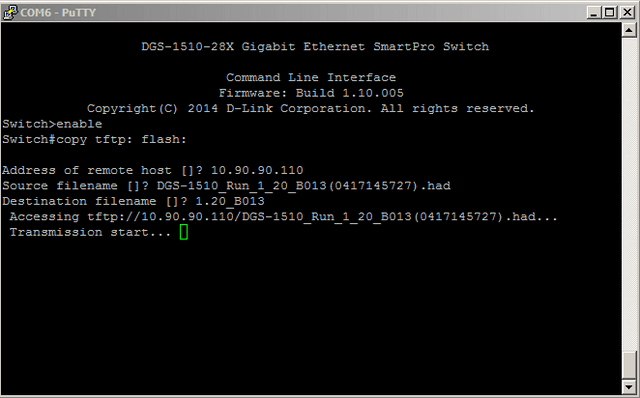
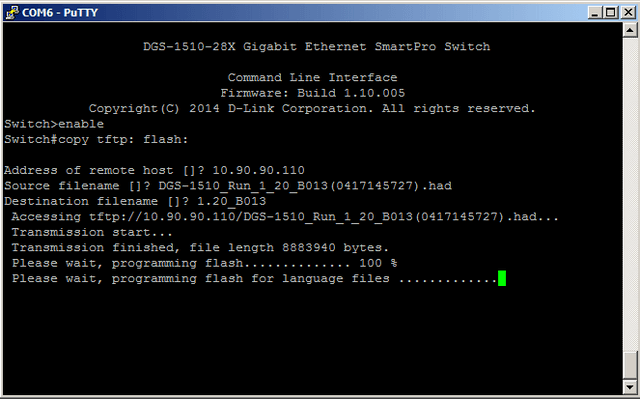
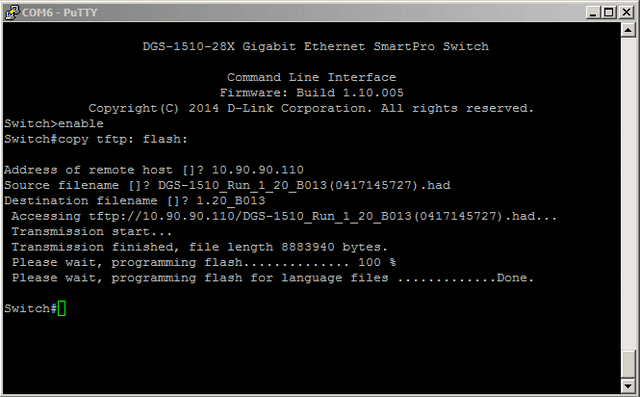
Step 6 – Upgrade firmware procedure
Switch#copy tftp: flash:
Address of remote host []? 10.90.90.110 (this is the address of the tftp server)
Source filename []? DGS-1510_Run_1_20_B013(0417145727).had
Destination filename []? 1.20_B013
You will also notice the tftp server will commence the transfer process (as below)

Step 7 – Save configuration to NVRAM
Switch#copy running-config startup-config
Destination filename startup-config? [y/n]: y
Saving all configurations to NV-RAM.......... Done.
Step 8 – Check which firmware is used to on boot
Switch#dir
Directory of /c:
1 -rw 8419464 Jan 01 2000 0001 2000 00:05:25 1.20_B013 In this example we are changing to this firmware
2 -rw 8071740 Jan 01 2000 0001 2000 00:08:35 runtime.had
3 -rw 34486 Jan 01 2000 0001 2000 00:15:57 config.cfg
4 d-- 0 Jan 01 2000 0001 2000 00:00:02 system
30656000 bytes total (13521408 bytes free)
Step 9 – Change the boot file
Switch(config)#boot image 1.20_B013
Switch(config)#end
Switch#reboot
Are you sure you want to proceed with the system reboot?(y/n) y
Step 10 – Check the firmware has been used on boot
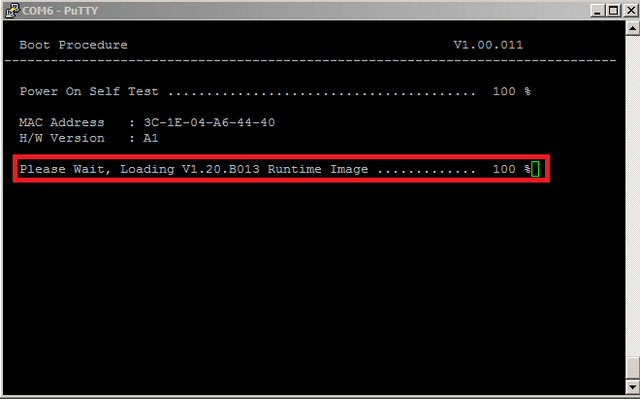
If you miss the above screen then enter the following command:
Switch# show boot
Unit 1
Boot image: /c:/1.20_B013
Boot config: /c:/config.cfg