
Comment configurer CMW avec un réseau sans-fil Multi SSIDs et Vlans ?
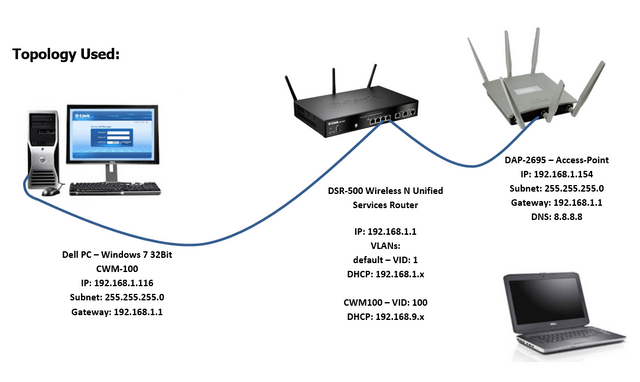
Scénario:
2x VLANs (default et CWM100)
2x SSIDs (Corporative and Guest)
Logiciel et matériels Utilisés :
- CWM-100 - Central WifiManager
- DSR-500N
- DAP-2695 HW:A1
- Module AP pour DAP-2695A1
- AP Installation Tool
Lien de téléchargement :
http://www.dlink.com/
Systèmes et navigateurs Compatibles :
Windows 7, Windows Server 2008R2 et Windows Server 2012R2
IE11, Firefox et Sarfari
Nous vous conseillons de vérifier régulièrement si de nouvelles versions logicielles et Firmwares ne sont pas disponibles sur notre site web.
Téléchargez les différents éléments sur votre disque dur et procédez comme suit :
Etape 1 – Configurez les VLANS. Dans notre scénario, nous utilisons le routeur DSR-500N.
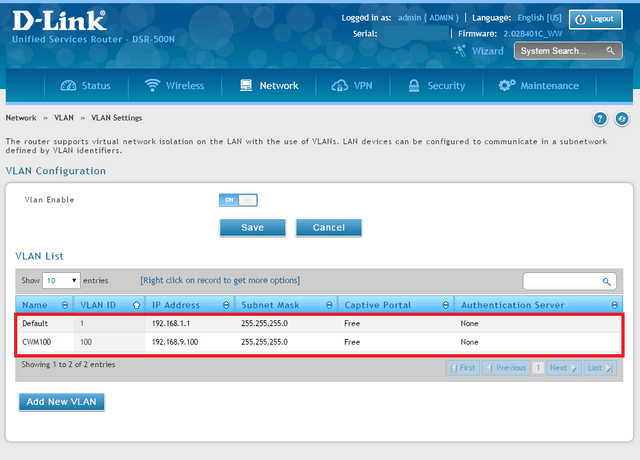
*InterVLAN Routing disabled sur les deux VLANs
Etape 2 – Configurez les ports pour les différents VLANs
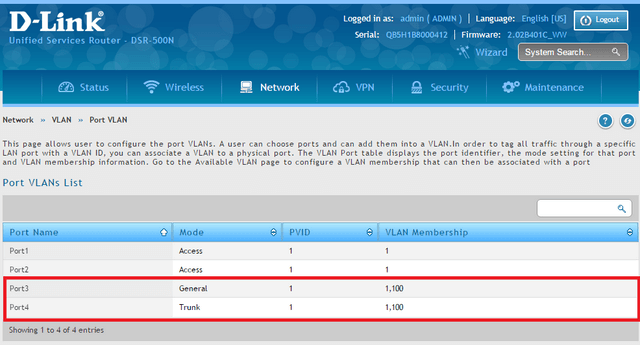
Port 3 – Ce port est connecté directement à notre PC
Port 4 – Ce port est connecté directement au port LAN1 (POE) de notre DAP-2695A1
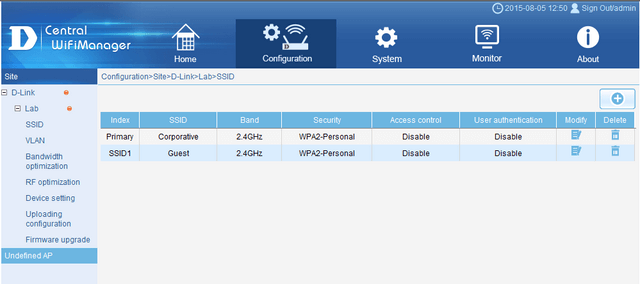
Etape 3 – Configuration du Multi-SSID sur CWM-100. Dans notre scénario, nous avons créé deux SSIDs; L'un est utilisé en tant que Primary SSID et aura accès au réseau corporative. L'autre SSID (SSID1) sera utilisé pour le réseau Guests pour ne donner qu'un accès à internet.
Pour ajouter un SSID à votre réseau, cliquez sur l'icône + dans le coin supérieur droit :

entrez les informations en suivant cet exemple : Primary SSID : Corporative
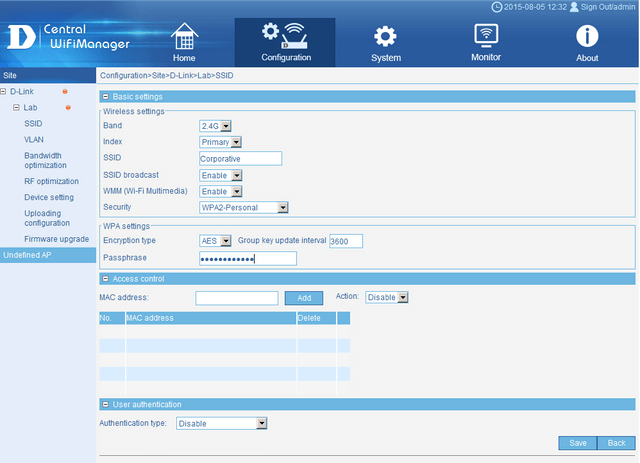
Cliquez sur Save
SSID1 : Guest

Vous pouvez faire en sorte que l'accès au SSID “Guest” se fasse au travers d'un portail captif ou d'un code (Passphrase). Dans ce scénario, nous avons utilisé un code.
Cliquez sur “Save”
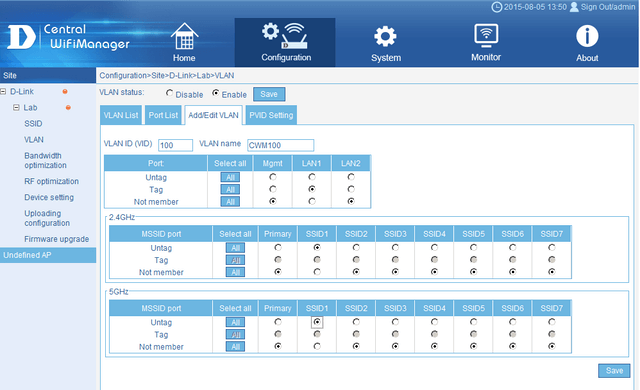
Etape 4 – Configuration des VLANs sur CWM-100. Dans notre scénarion nous devons nous assurer que les informations utilisées pour les VLANs sont les mêmes que pour le DSR-500N. Par défaut, le statut du VLAN est “Disabled”. Pour l'activer, cliquez sur le bouton radio “Enable” puis cliquez sur “Save”

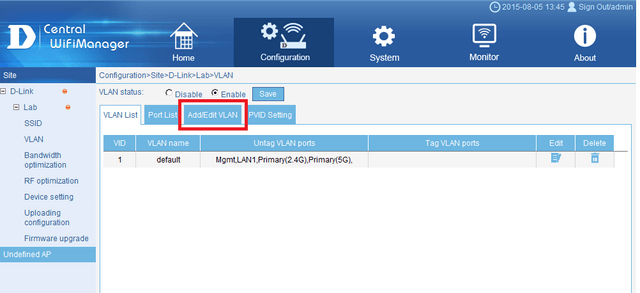
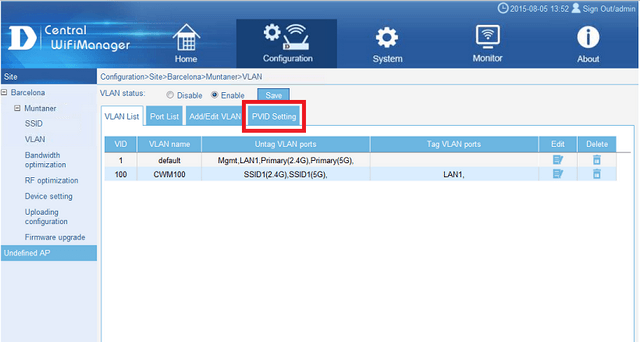
Etape 5 – Modifiez le VLAN par défaut pour correspondre à celui de notre exemple. Pour ce faire, cliquez sur “Edit” et configurez CMW en suivant l'exemple suivant:
Cliquez sur “Save”
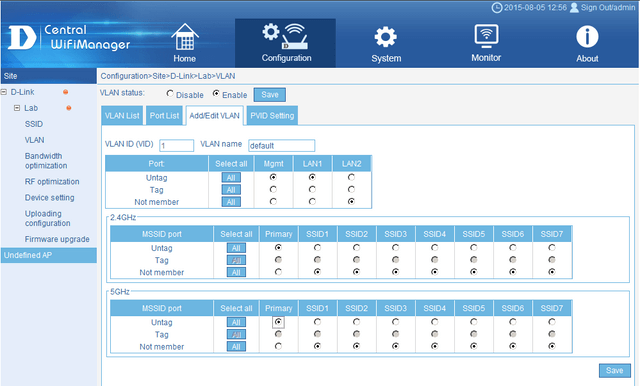
Etape 6 – Créez le VLAN “CMW100”
Click on “Add/Edit VLAN” and configure using the following example:
Click “Save”
Step 7 – Configure PVID Settings. To do this click “PVID Setting” tab
Then configure using the following example:
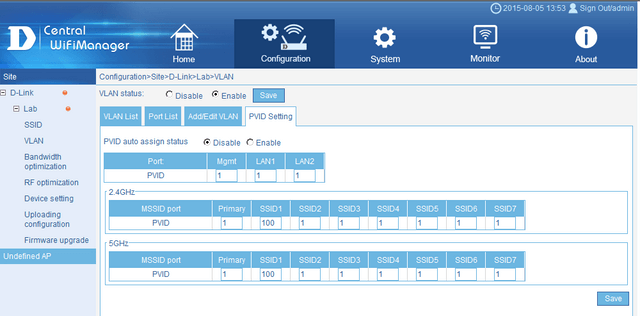
Click “Save”
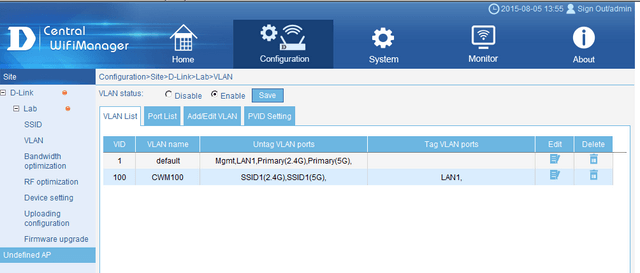
You should see the following screen
Step 8 – Export the configuration. To do this you will need to go your “Site”. In our example we have named it “D-Link”
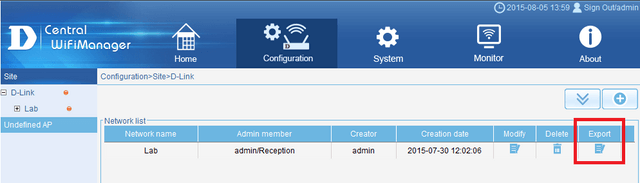
Click “Export”
Click “Save”
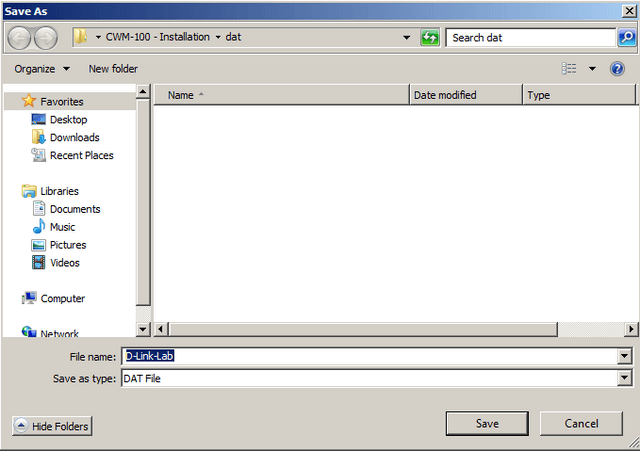
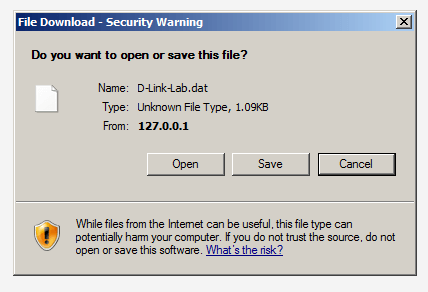
Click “Save” – this will save as “D-Link-Lab.dat” file

Click “Close”
Step 9 – Set the IP of the Access-Point. To do this, you will need to run the “AP Installation tool.exe”.
![]()
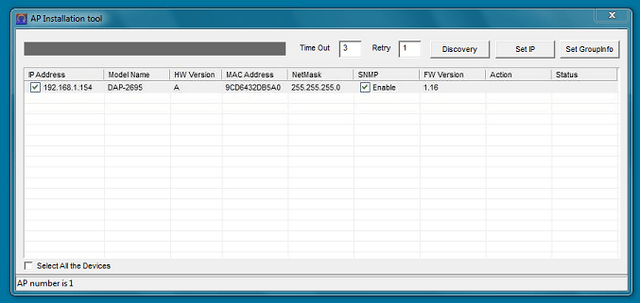
Click the box to select the AP then click on “Set IP”. Set it to “Dynamic IP address”, once obtained then set it to “Static IP Address”
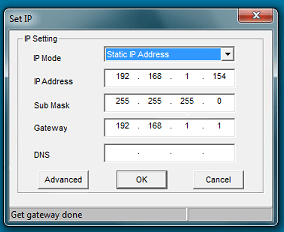
Click “OK”
Wait until “Status” shows “OK”
Step 9 – Upload the .dat configuration file to the access-point. To do this, again click the box to select the access-point then click “Set GroupInfo”
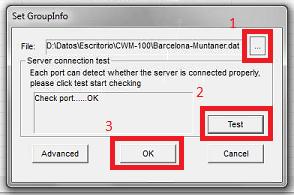
1) Search for the .dat configuration file in Step 8
2) Click “Test” – This should show “OK”
If this doesn’t show ok, you must check the LAN connection and the AP is on the same subnet
3) Click “OK” to finalise the upload
Wait until “Status” shows “OK”
Step 10 – Upload configuration in CWM-100. To do this, go to the following menú
Configuration > Site > Network > SSID > Uploading configuration

Click “Complete”

The process will go through a stage of “Rebooting”. Once complete, you should get the following output:

If you don’t receive the above and you get a “Fail”, you will need to check the following:
1) Network connections
2) VLANs are correctly setup
3) Correct Module has been installed
You should be able to connect to either of the SSID created and they should provide the corresponding IPs. In our example, if you connect to “Corporative” SSID, you will receive the IP within the range of 192.168.1.x and will have access to ALL LAN resources + INTERNET. If you connect to “Guest” SSID, you will receive the IP within the range of 192.168.9.x and have ONLY access to the INTERNET.
Ceci peut également aider.
- CWM-100 Installation Troubleshooting Lire la réponse
- How to Setup Captive Portal and Passcodes CWM-100 Lire la réponse