
How do I mount my camera to the wall or ceiling?
Note: It is suggested that you configure the camera before mounting.
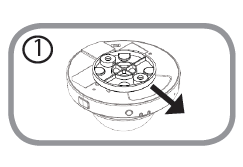
Step 1: The camera needs to be separated from the mounting base to expose the holes in the mounting base. Remove the camera head from the mounting base by firmly holding the camera with the D-Link logo facing you and then sliding the mounting base towards you.
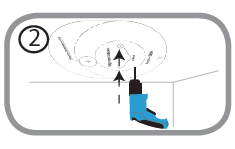
Step 2: Place the mounting base alignment sticker where you want to position the camera. Depending on the material of the wall or ceiling, use proper tools to drill two holes where you placed the alignment sticker. If the wall is made out of concrete, drill the holes first, then insert the plastic anchors to support the screws.
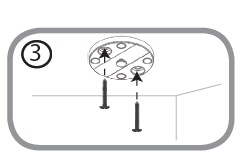
Step 3: Place the mounting base over the holes that are in the wall. Make sure to align the mounting base holes with the holes in the wall. Use the supplied screws to attach the mounting base to the surface of the wall.
Note: Do not over-tighten screws as this may crack the mount.
Step 4: With the D-Link logo facing you, reattach the camera to the mounting plate by sliding the camera towards you until it locks into position.
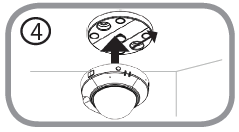
Step 5: Adjust the angle of the camera as desired by rotating the camera body.

Ceci peut également aider.
- How do I access my mydlink camera remotely? Lire la réponse
- How do I change the LAN IP address of my camera? Lire la réponse
- How do I configure Internet Explorer to allow ActiveX Controls? Lire la réponse
- How do I configure motion detection on my camera? Lire la réponse
- How do I configure the audio settings (audio out and microphone) on my DCS-6004L? Lire la réponse
- How do I find the IP address of my DCS-6004L and access the web-based user interface? Lire la réponse
- How do I manually upgrade the firmware on my camera? Lire la réponse
- How do I set an administrator (admin) password on my DCS-6004L? Lire la réponse
- How do I set up and install my DCS-6004L? Lire la réponse
- What can I do when Active X fails to install during my mydlink camera setup? Lire la réponse
- What do I do if I forget the Admin password for my camera? Lire la réponse