
How to Install - DCS-960L Manually with an iPad
Requirements:
• Wireless router or access-point
• Quick Install Card (If lost, the information required is also on reverse side of camera)
• iPad
• mydlink Account
• mydlink Lite installed
• Wi-Fi Password of your existing wireless network
• QR Code Reader installed
You may find the mydlink Lite app on the following link:
https://www.mydlink.com/apps
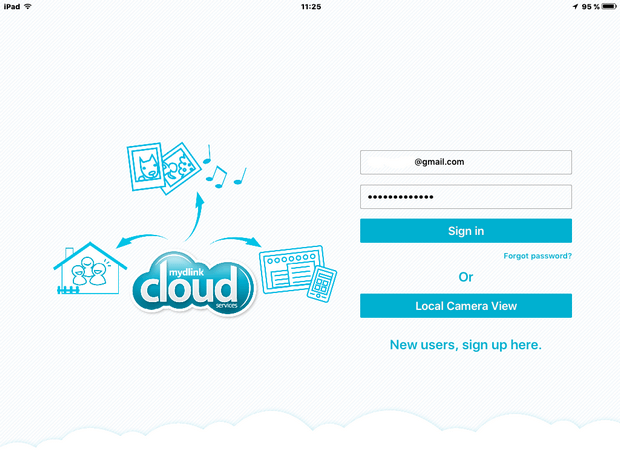
Step 1 – Login to your mydlink account via the mydlink Lite APP
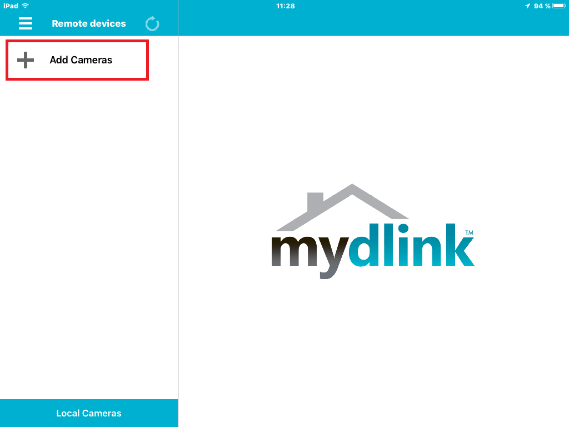
Step 2 – To add a camera to your mydlink account, simply tap “Add Cameras”
Step 3 – In this example we have chosen to install “Manually”
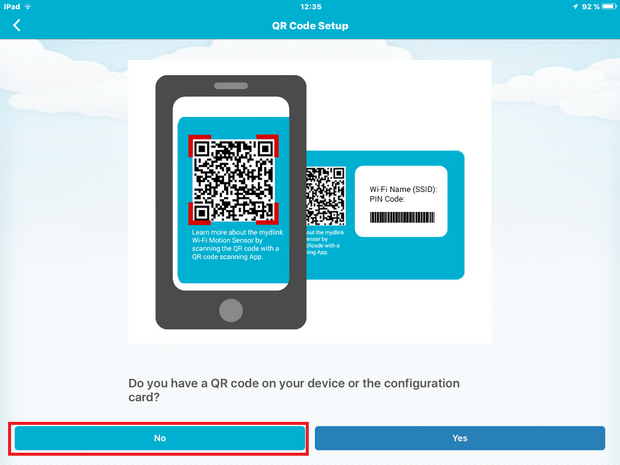
Tap “No”
Step 4 – Scroll down the list to find the camera. In this example it is the “DCS-960L”
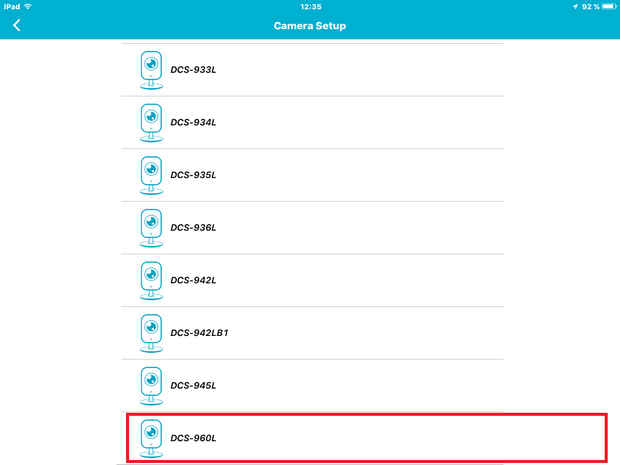
Tap to select the “DCS-960L”
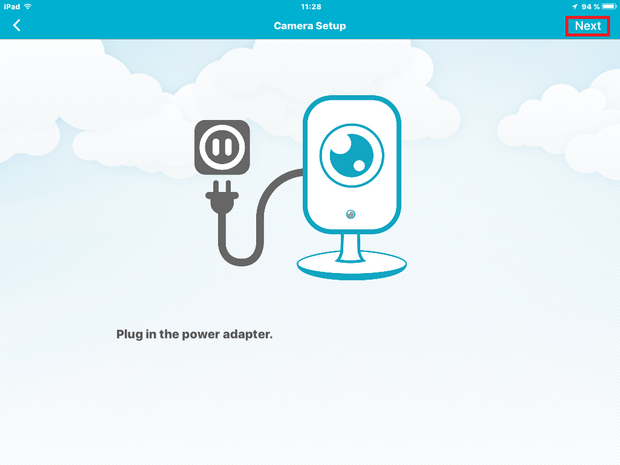
Step 5 – Make sure the DCS-960L camera is powered. Once confirmed, tap “Next”
Step 6 – In this example we have chosen to use the Wi-Fi from our access-point, rather than WPS.

Tap “No”
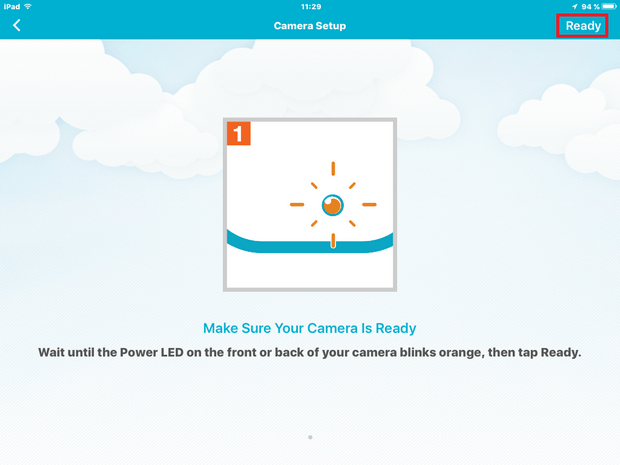
Step 7 – Once the camera is ready and the LED is flashing orange – Tap “Ready”
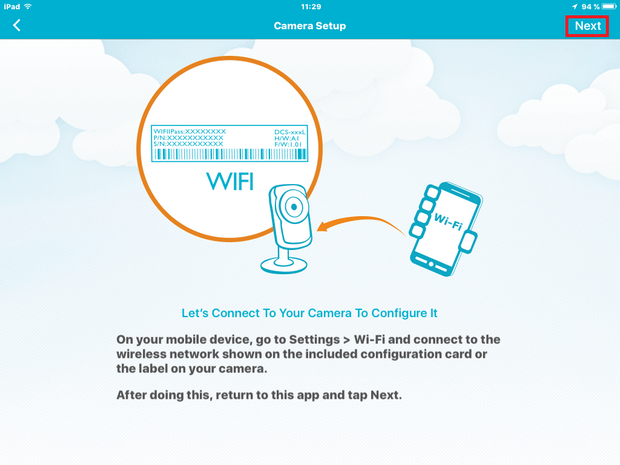
Step 8a – Before tapping “Next”, you must connect the iPad to the wireless SSID of the camera (This can be found also on the “Quick Install Card” or the reverse side of the camera)
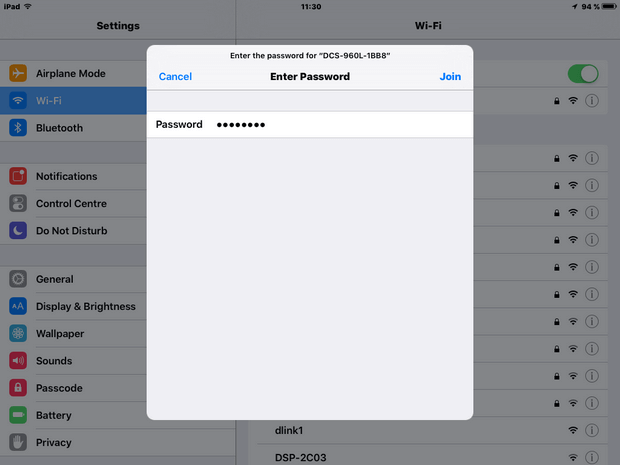
Enter the password and tap “Join” the return to the setup wizard then go to Step 8b
Step 8b - Once you have connected – tap “Next”
Step 9 – Once connected to the wireless network of the camera, you will be presented to connect to an existing Wi-Fi network
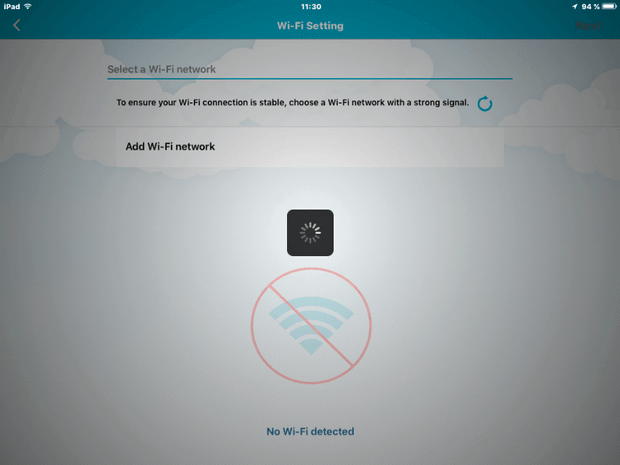
If none are shown, tap the refresh button to search again

In our example, we have created a Wi-Fi Network with the SSID: “DCS-960L”
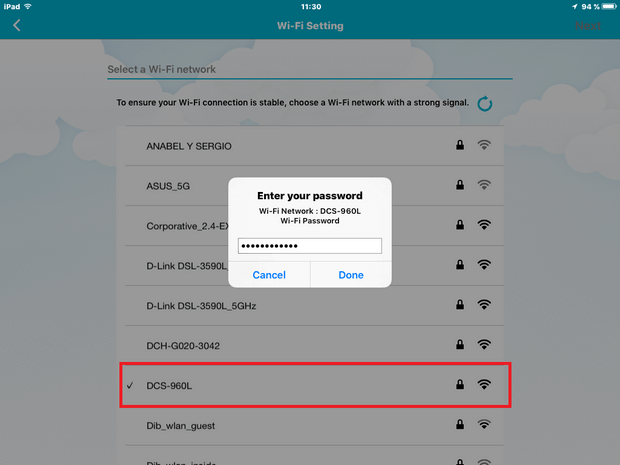
Tap the SSID of the Wi-Fi Network to connect and enter the password. Once done, tap “Done”
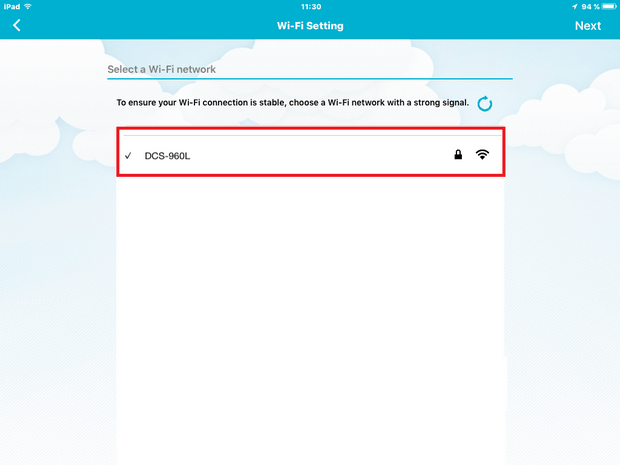
Step 10 – Once you have established connection, it should be presented with a tick against the SSID or Wi-Fi Network as below.
Step 11 – Enter a password for the camera (make sure to remember this)
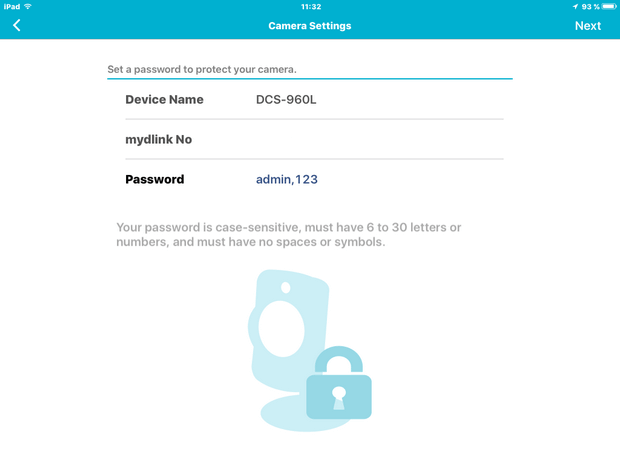
Once done, tap “Next”
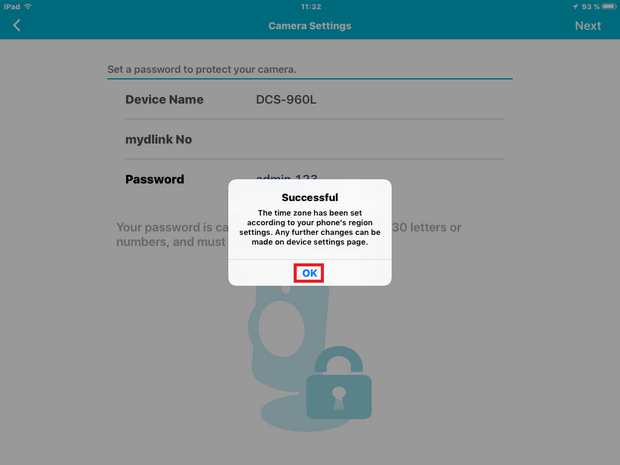
Once you get the above “Successful” message, tap “OK”
Step 12 – Add the camera to your mydlink account
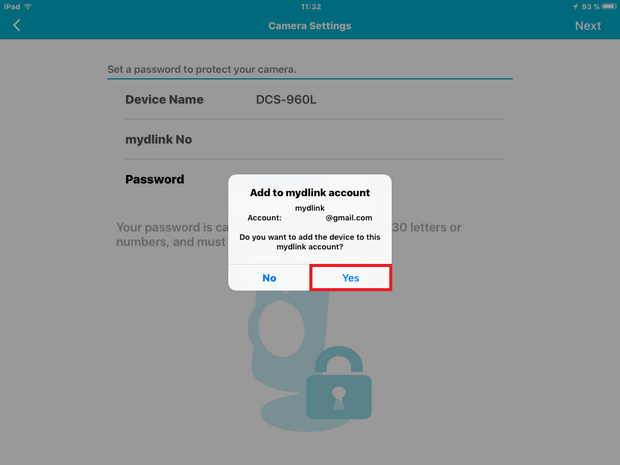
Tap “Yes”
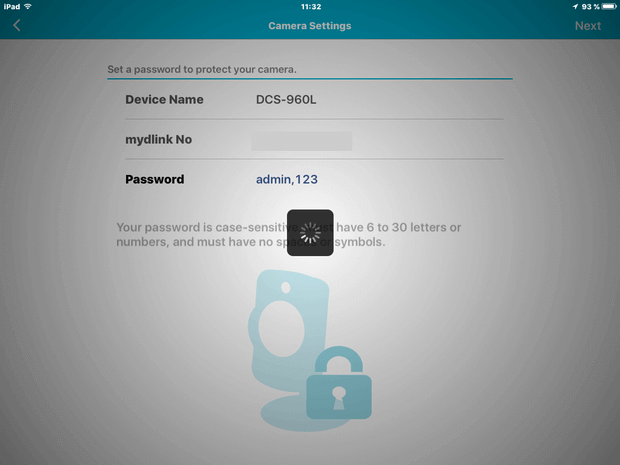
Step 13 – Wait for the camera to save the settings…
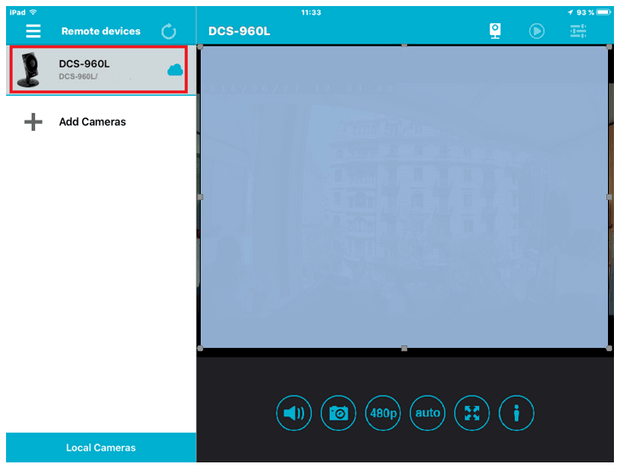
Step 14 – The camera is now added to the mydlink account as below:
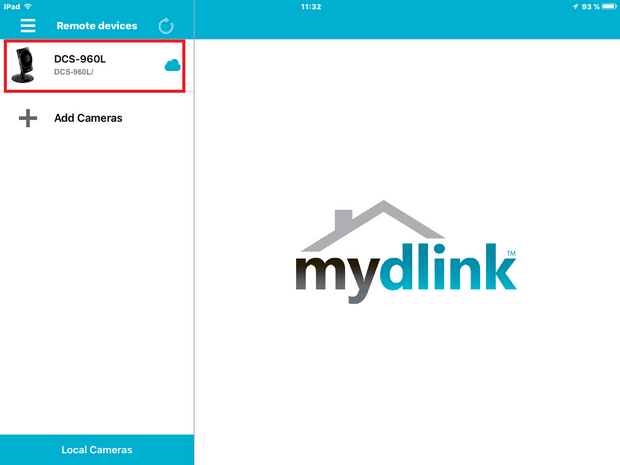
Step 15 – Tap on the camera name to reveal live view
• Wireless router or access-point
• Quick Install Card (If lost, the information required is also on reverse side of camera)
• iPad
• mydlink Account
• mydlink Lite installed
• Wi-Fi Password of your existing wireless network
• QR Code Reader installed
You may find the mydlink Lite app on the following link:
https://www.mydlink.com/apps
Step 1 – Login to your mydlink account via the mydlink Lite APP
Step 2 – To add a camera to your mydlink account, simply tap “Add Cameras”
Step 3 – In this example we have chosen to install “Manually”
Tap “No”
Step 4 – Scroll down the list to find the camera. In this example it is the “DCS-960L”
Tap to select the “DCS-960L”
Step 5 – Make sure the DCS-960L camera is powered. Once confirmed, tap “Next”
Step 6 – In this example we have chosen to use the Wi-Fi from our access-point, rather than WPS.
Tap “No”
Step 7 – Once the camera is ready and the LED is flashing orange – Tap “Ready”
Step 8a – Before tapping “Next”, you must connect the iPad to the wireless SSID of the camera (This can be found also on the “Quick Install Card” or the reverse side of the camera)
Enter the password and tap “Join” the return to the setup wizard then go to Step 8b
Step 8b - Once you have connected – tap “Next”
Step 9 – Once connected to the wireless network of the camera, you will be presented to connect to an existing Wi-Fi network
If none are shown, tap the refresh button to search again
In our example, we have created a Wi-Fi Network with the SSID: “DCS-960L”
Tap the SSID of the Wi-Fi Network to connect and enter the password. Once done, tap “Done”
Step 10 – Once you have established connection, it should be presented with a tick against the SSID or Wi-Fi Network as below.
Step 11 – Enter a password for the camera (make sure to remember this)
Once done, tap “Next”
Once you get the above “Successful” message, tap “OK”
Step 12 – Add the camera to your mydlink account
Tap “Yes”
Step 13 – Wait for the camera to save the settings…
Step 14 – The camera is now added to the mydlink account as below:
Step 15 – Tap on the camera name to reveal live view
These may also help:
- How to Install DCS-960L with QR Code with an iPad Read Answer