
How do I manually upgrade the firmware on my baby camera using Windows®?
Note: Before carrying out this procedure, please ensure that the computer you are using is connected to the same wireless network as your mydlink Baby Camera.
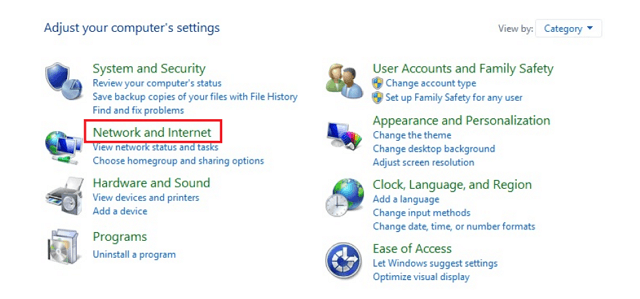
Step 1: In the Control Panel, click Network and Internet.
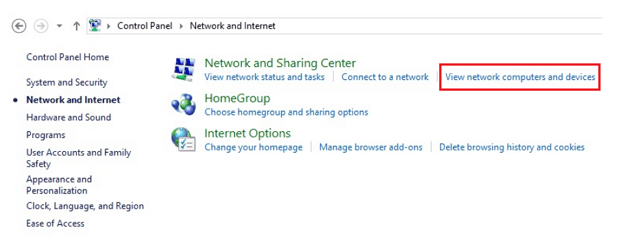
Step 2: Click View network computers and devices.
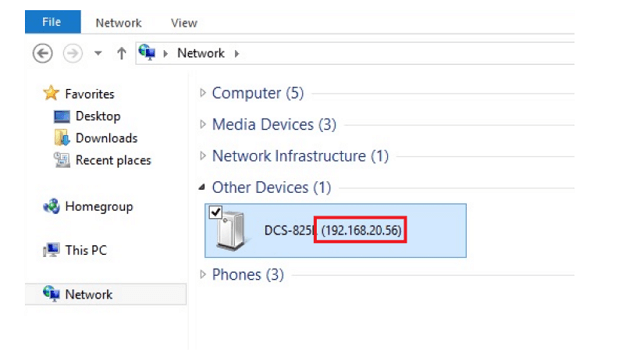
Step 3: Make a note of the camera’s IP address.
Step 4: Open a web browser and enter “http://IP_Address/eng/admin/tools_firmware.cgi” in the address bar (where IP_Address is the IP address you made a note of in Step 3). eg: http://192.168.20.56/eng/admin/tools_firmware.cgi
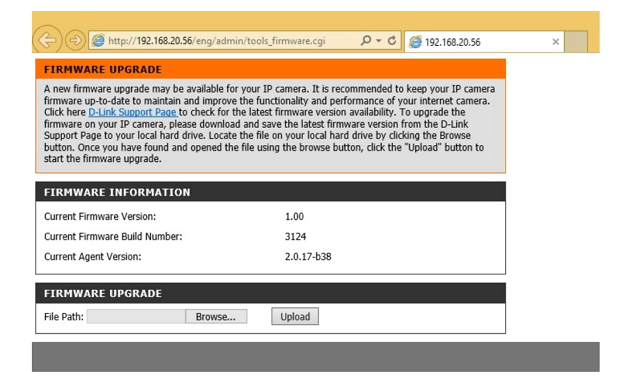
Step 5: If you do not already have the firmware file to use, follow the instructions on this page to download the latest file from the D-Link Support Page. Then click the Browse… button and locate the file. Once you have located the firmware file, click Upload to commence the upgrade process.
Warning: Do not turn off your mydlink Baby Camera during this process. It is recommended that this process is only carried out while the camera is connected directly to a power outlet using the supplied power adapter.
These may also help:
- How do I manually upgrade the firmware on my mydlink Baby Camera using a computer with a Mac operating system? Read Answer
- How do I reset my camera to factory default settings? Read Answer